
Chain oiler for the Kawasaki Versys 1000 SE
3 installation reports for this model

Installation report by Hans-Udo
Kawasaki Versys 1000 SE – year of manufacture 2019
oil reservoir 120 ml
On the left-hand side of the subframe, behind the fairing
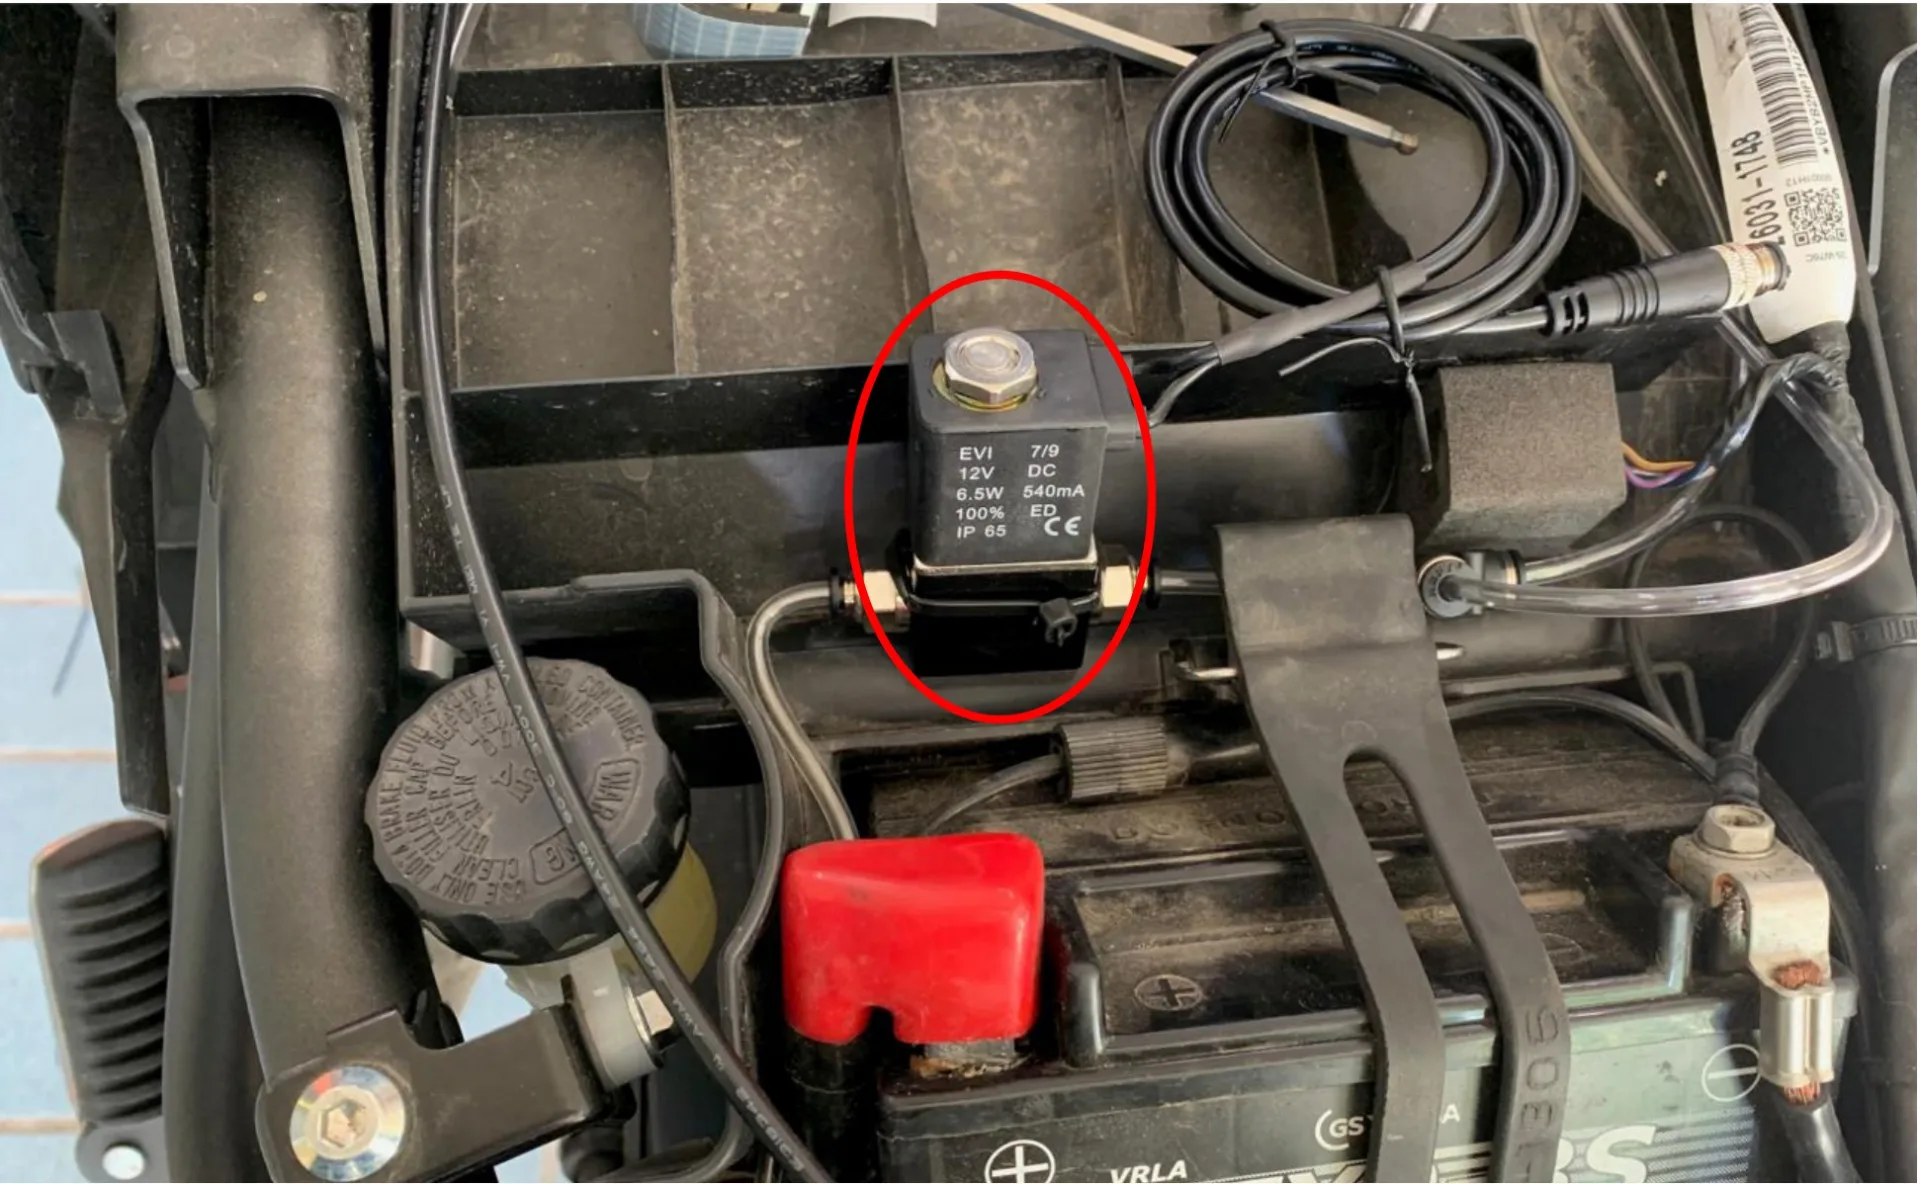
metering valve
The metering valve is fitted to the bracket of the rear suspension adjustment electronics

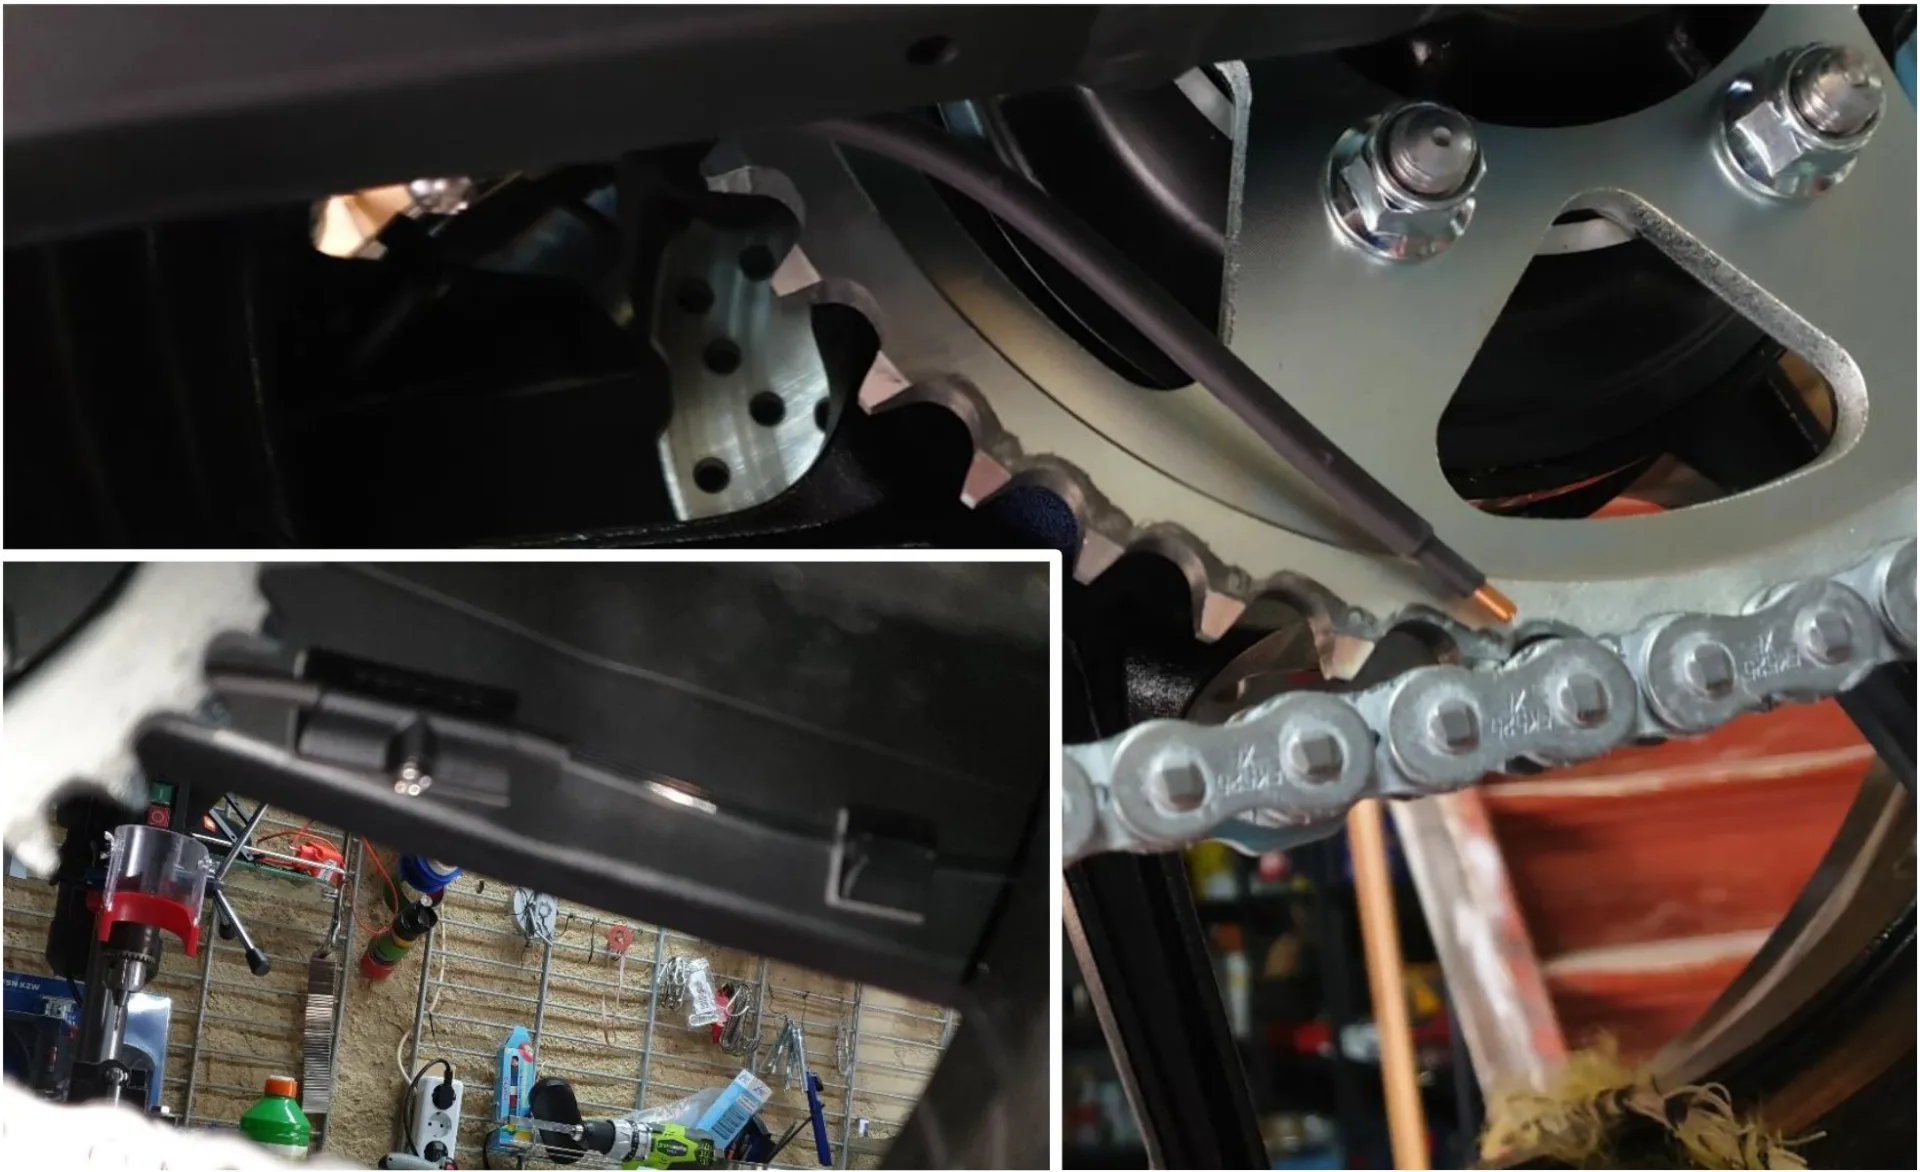
nozzle
At the rear sprocket, outer side (the nozzle bracket is glued to the inside of the swingarm)
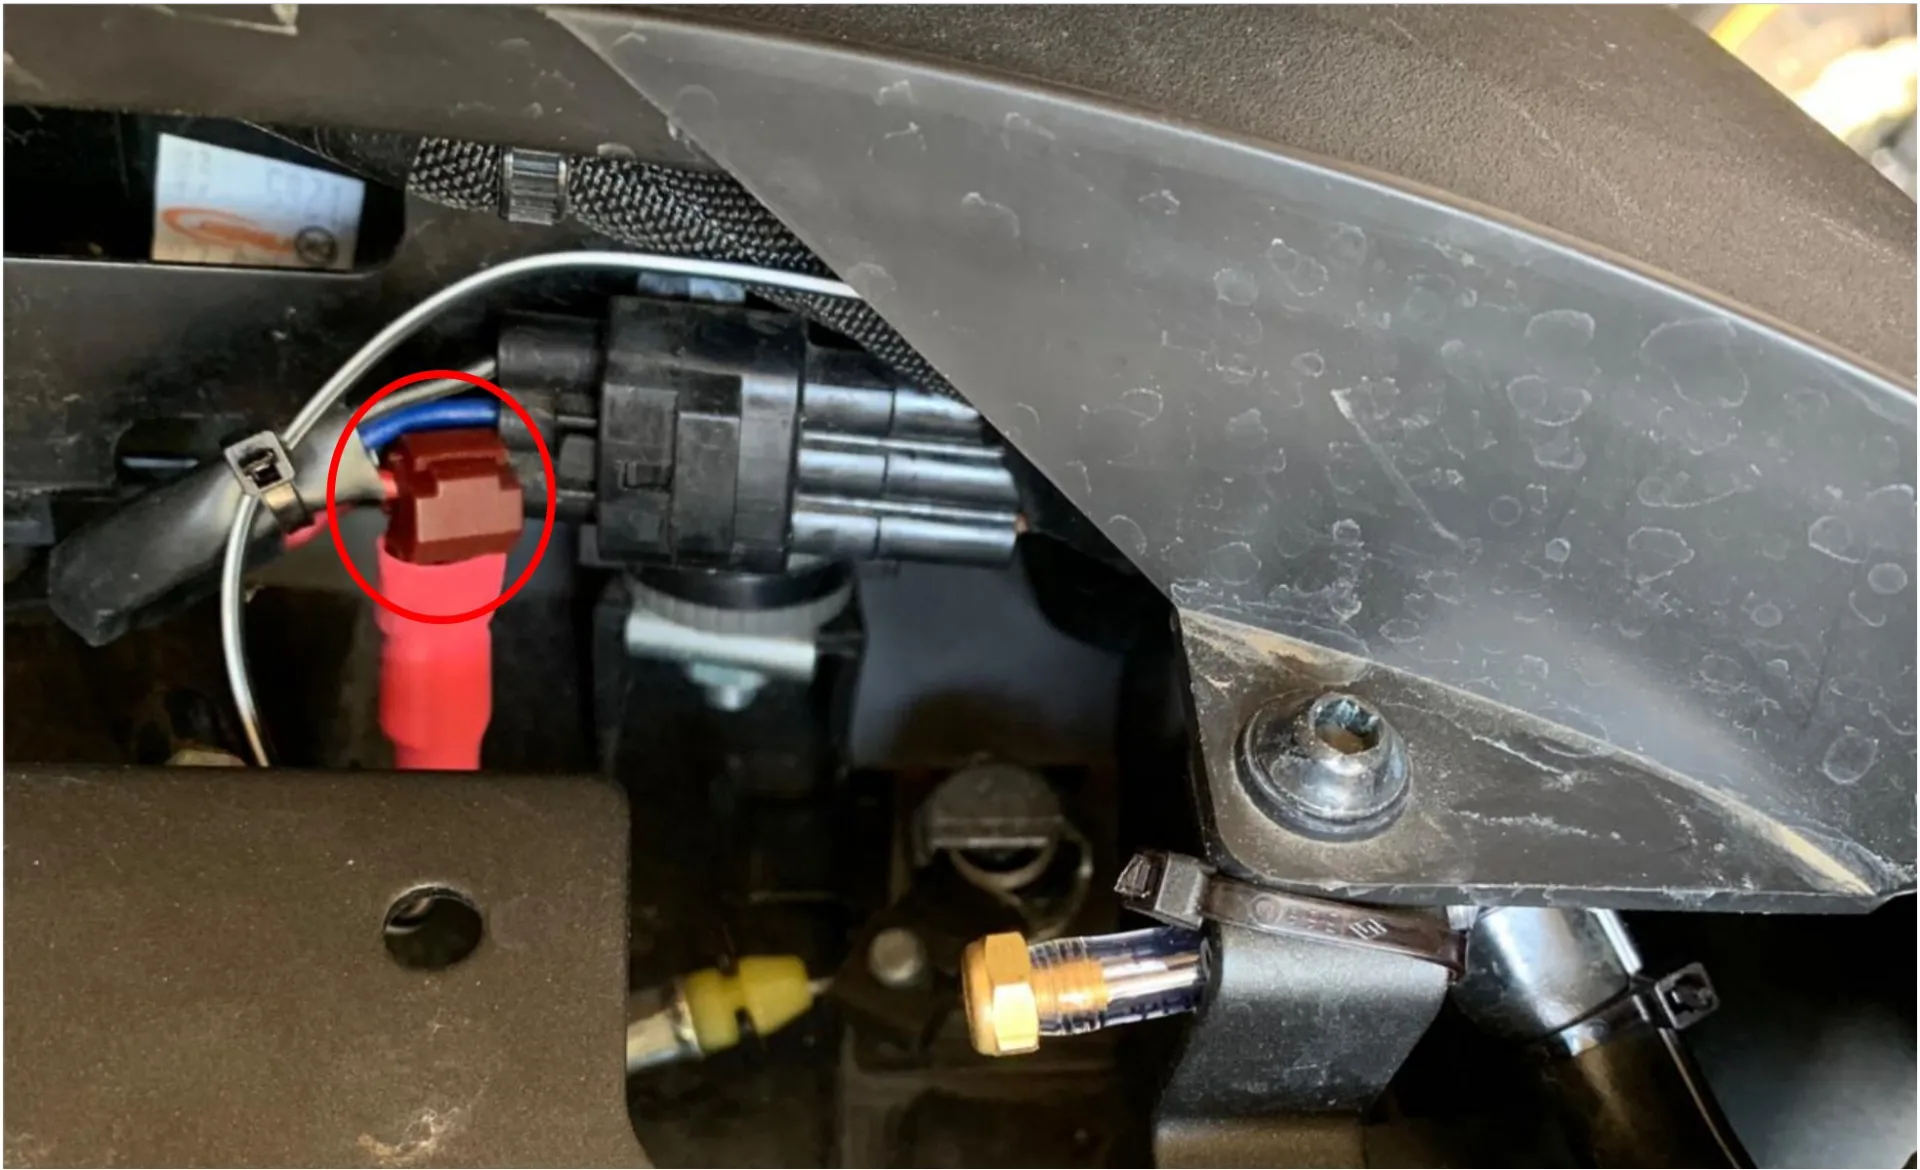
switched 12 V supply
At the taillight, tapped on the middle (red-blue) wire with the branch connector

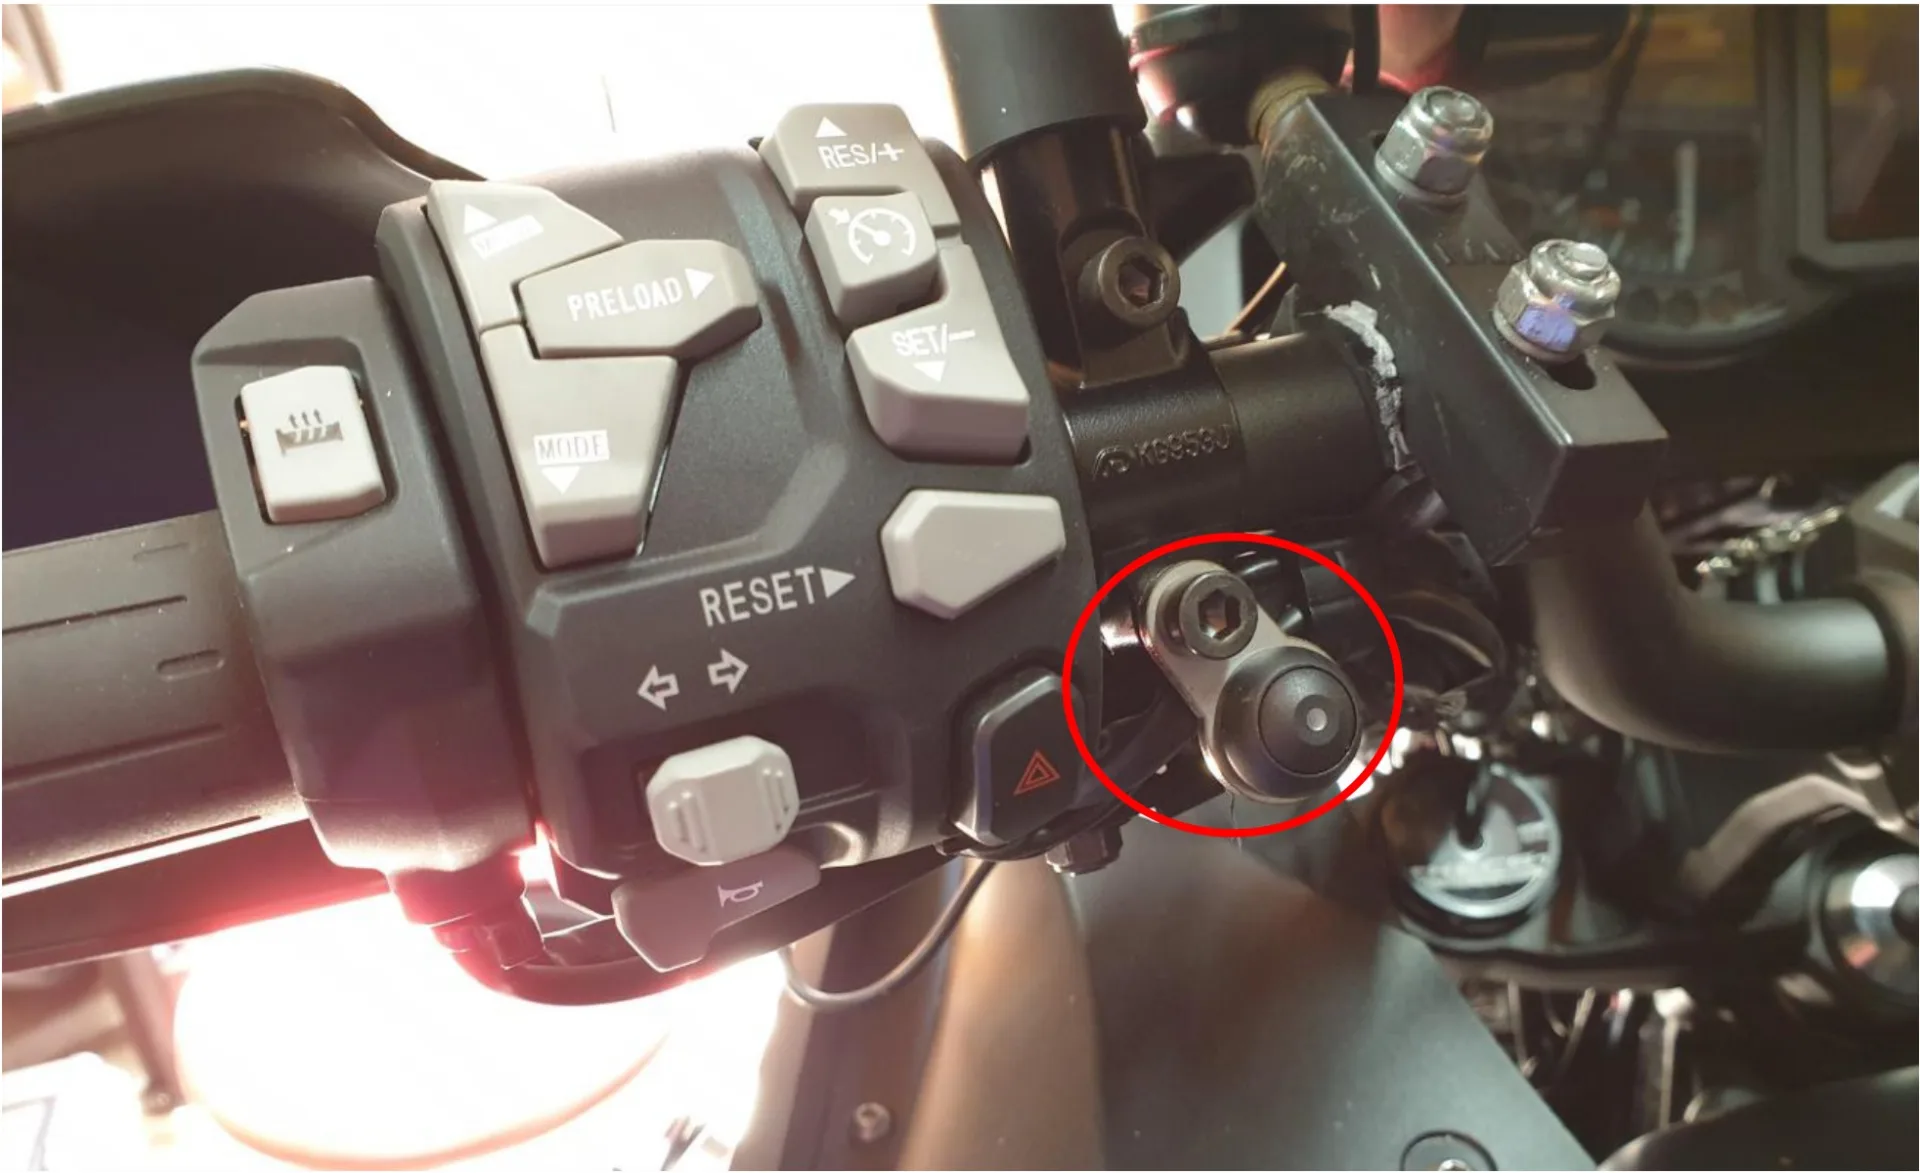
rain switch
On the left-hand side of the handlebar
control unit
Under the seat, next to the battery


Installation report by Detlef
Kawasaki Versys 1000 SE – year of manufacture 2019
oil reservoir 60 ml
On the right-hand side of the subframe
metering valve
It is fitted to the metal bracket of the footpeg mount / brake hose guide and secured with two thick cable ties

nozzle
At the rear sprocket, outer side

switched 12 V supply
At the taillight, clamped to the middle wire with the branch connector

rain switch
On the right-hand side of the handlebar

control unit
Next to the battery


Installation report by Udo W.
Kawasaki Versys 1000 SE – year of manufacture 2016
oil reservoir 60 ml
Attached at the rear left under the fairing with two cable ties (with the variable reservoir vent fitted in addition)
metering valve
The metering valve sits under the seat behind the battery, attached with an adhesive pad and a cable tie.
nozzle
The nozzle sits at roughly 7 o’clock and is attached to the inside of the swingarm with the adhesive bracket.

switched 12 V supply
I tapped the switched positive at the taillight (red wire) with a branch connector. Positive from the battery and negative on the frame.
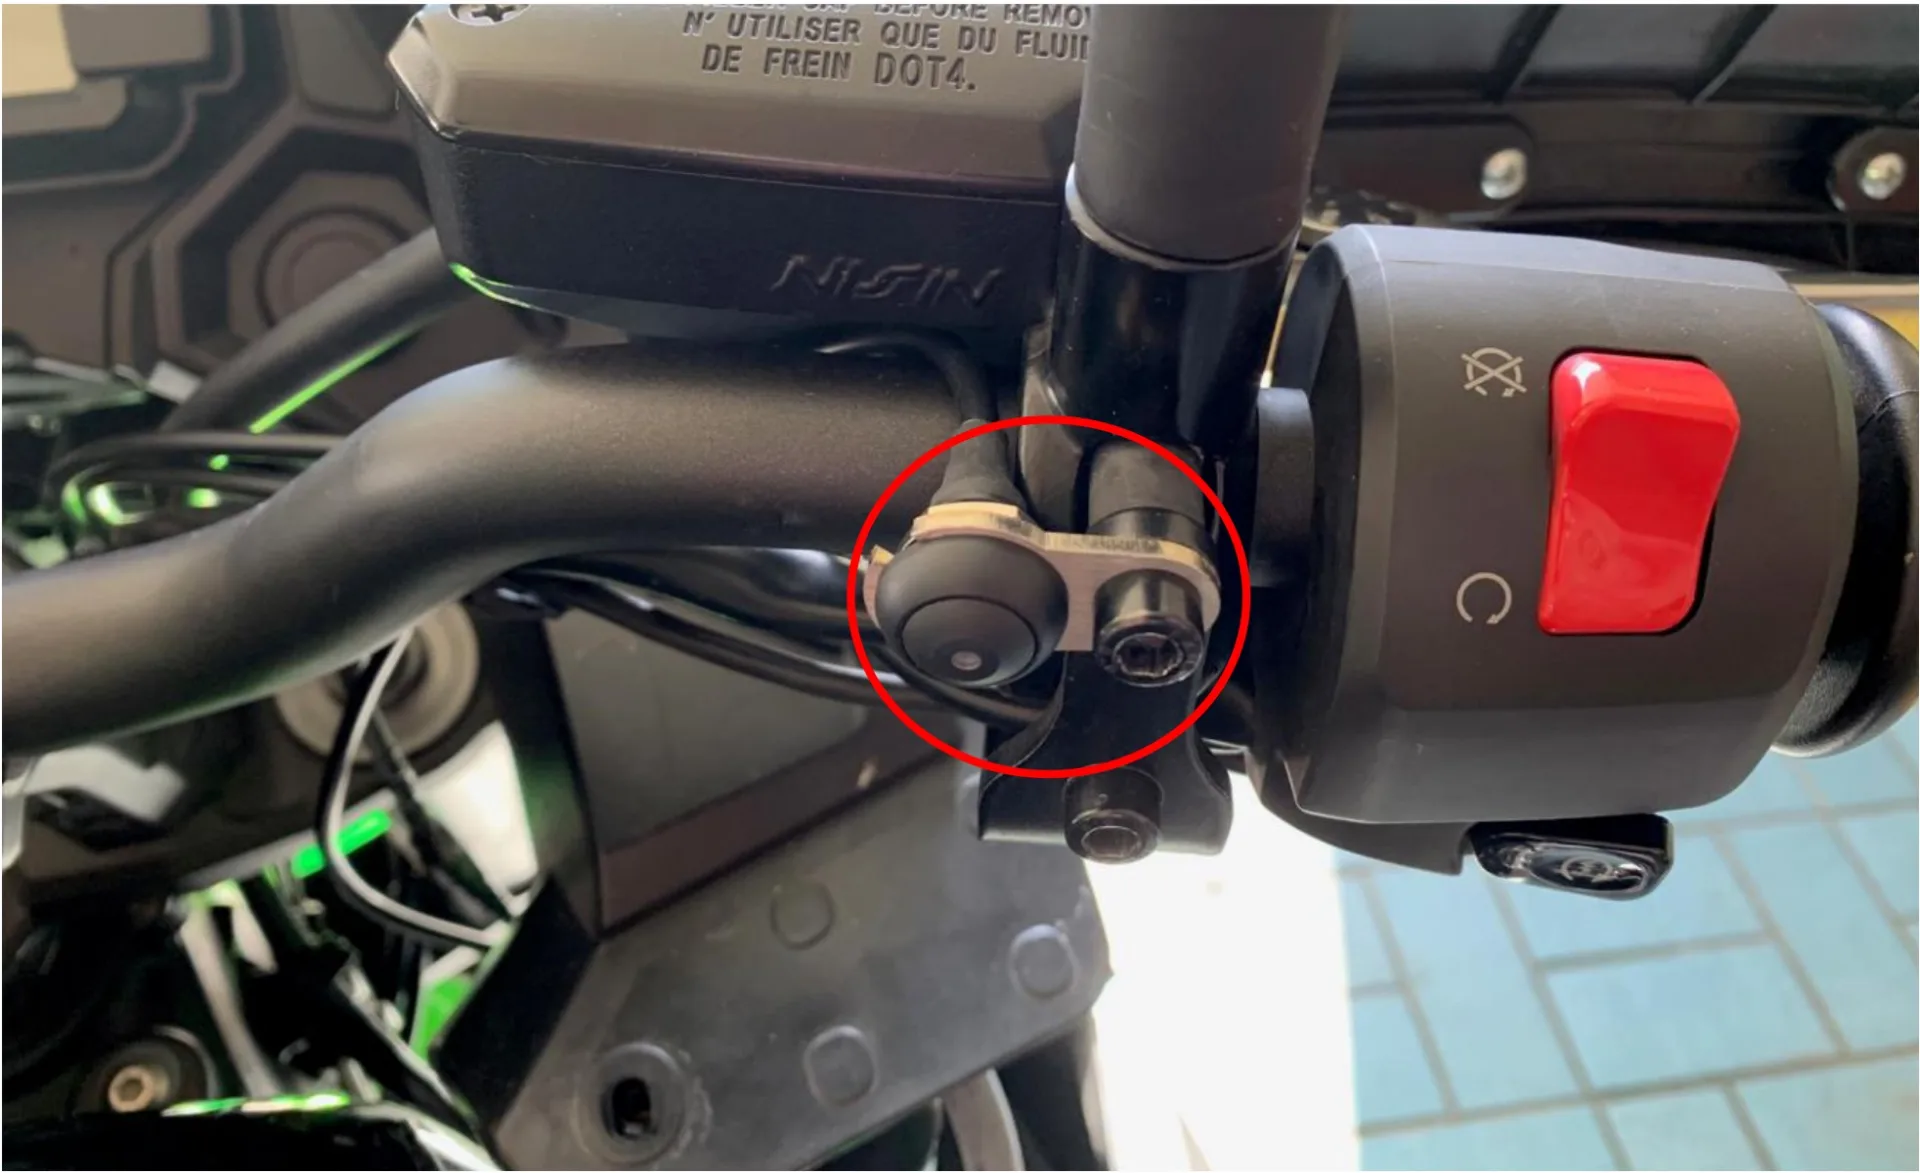
rain switch
The rain switch is at the front right on the mirror, upper bolt.
control unit
The control unit sits under the seat on the left-hand side, in front of the battery, attached with an adhesive pad and a cable tie.


