
Chain oiler for the Honda CB125R
2 installation reports for this model
Installation report by Frank T.
Honda CB125R – year of manufacture 2020
This is how Frank T. solved the installation – unfortunately we cannot guarantee that it works correctly, as we were not able to check the installation ourselves.
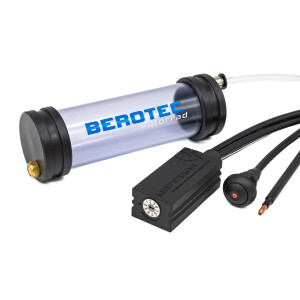
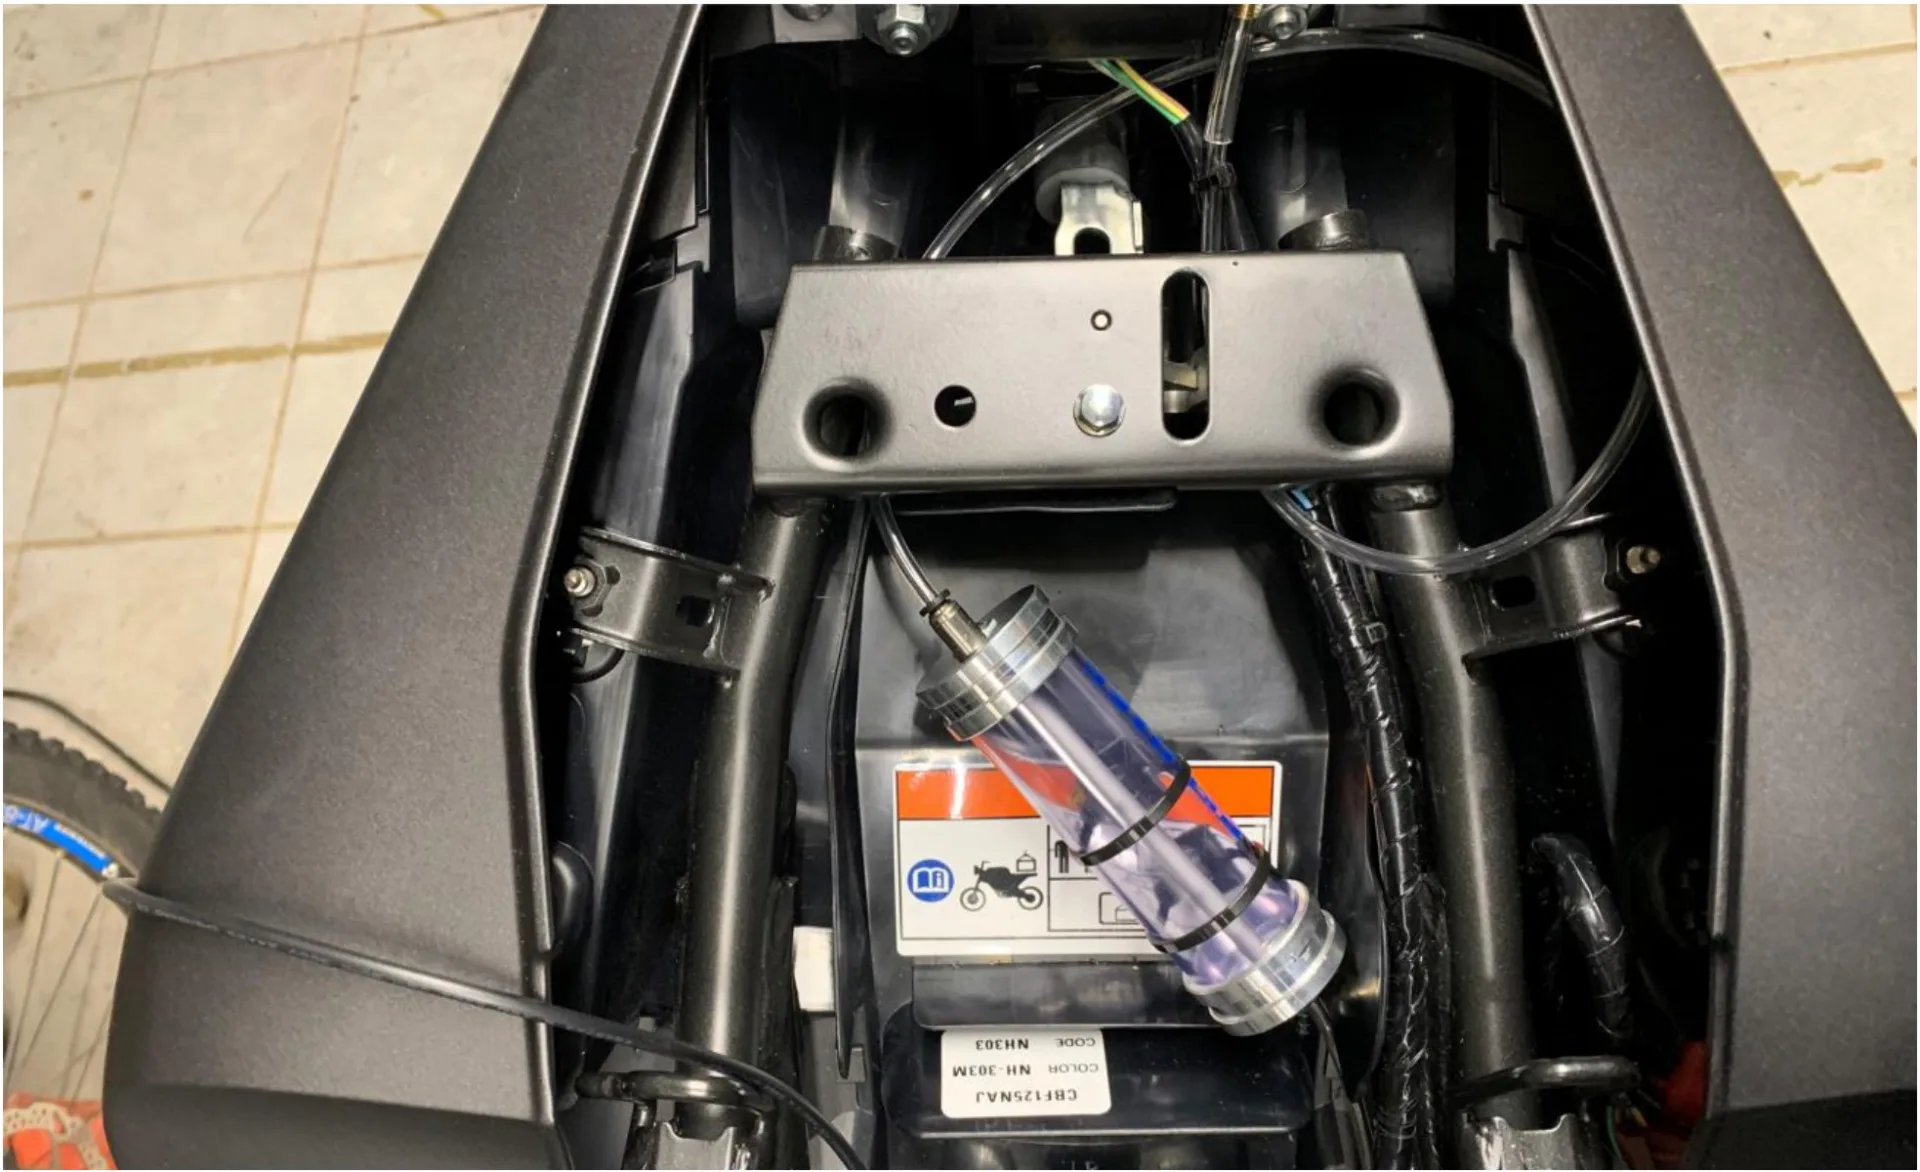
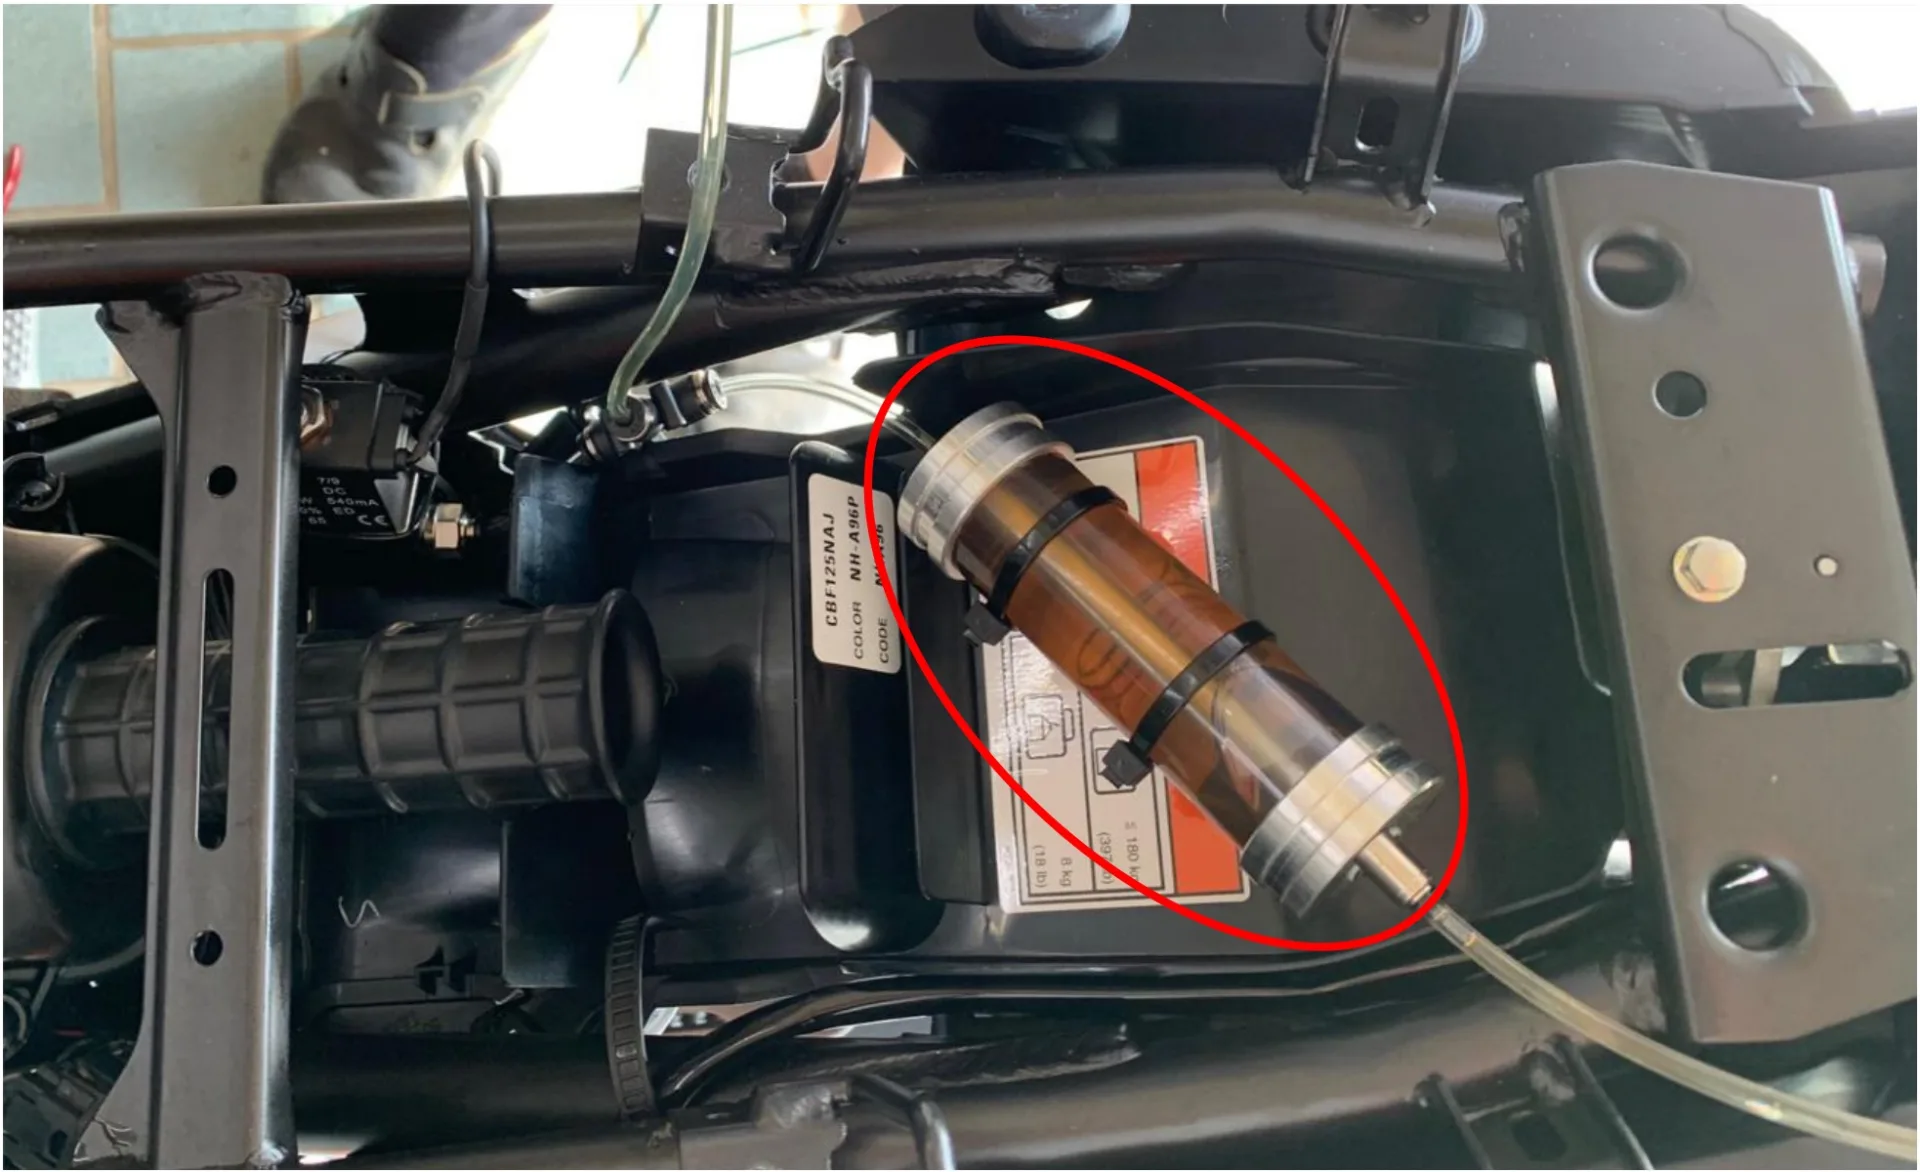
Oil reservoir 60 ml
The oil reservoir sits under the rear seat and is attached with two adhesive brackets and cable ties.
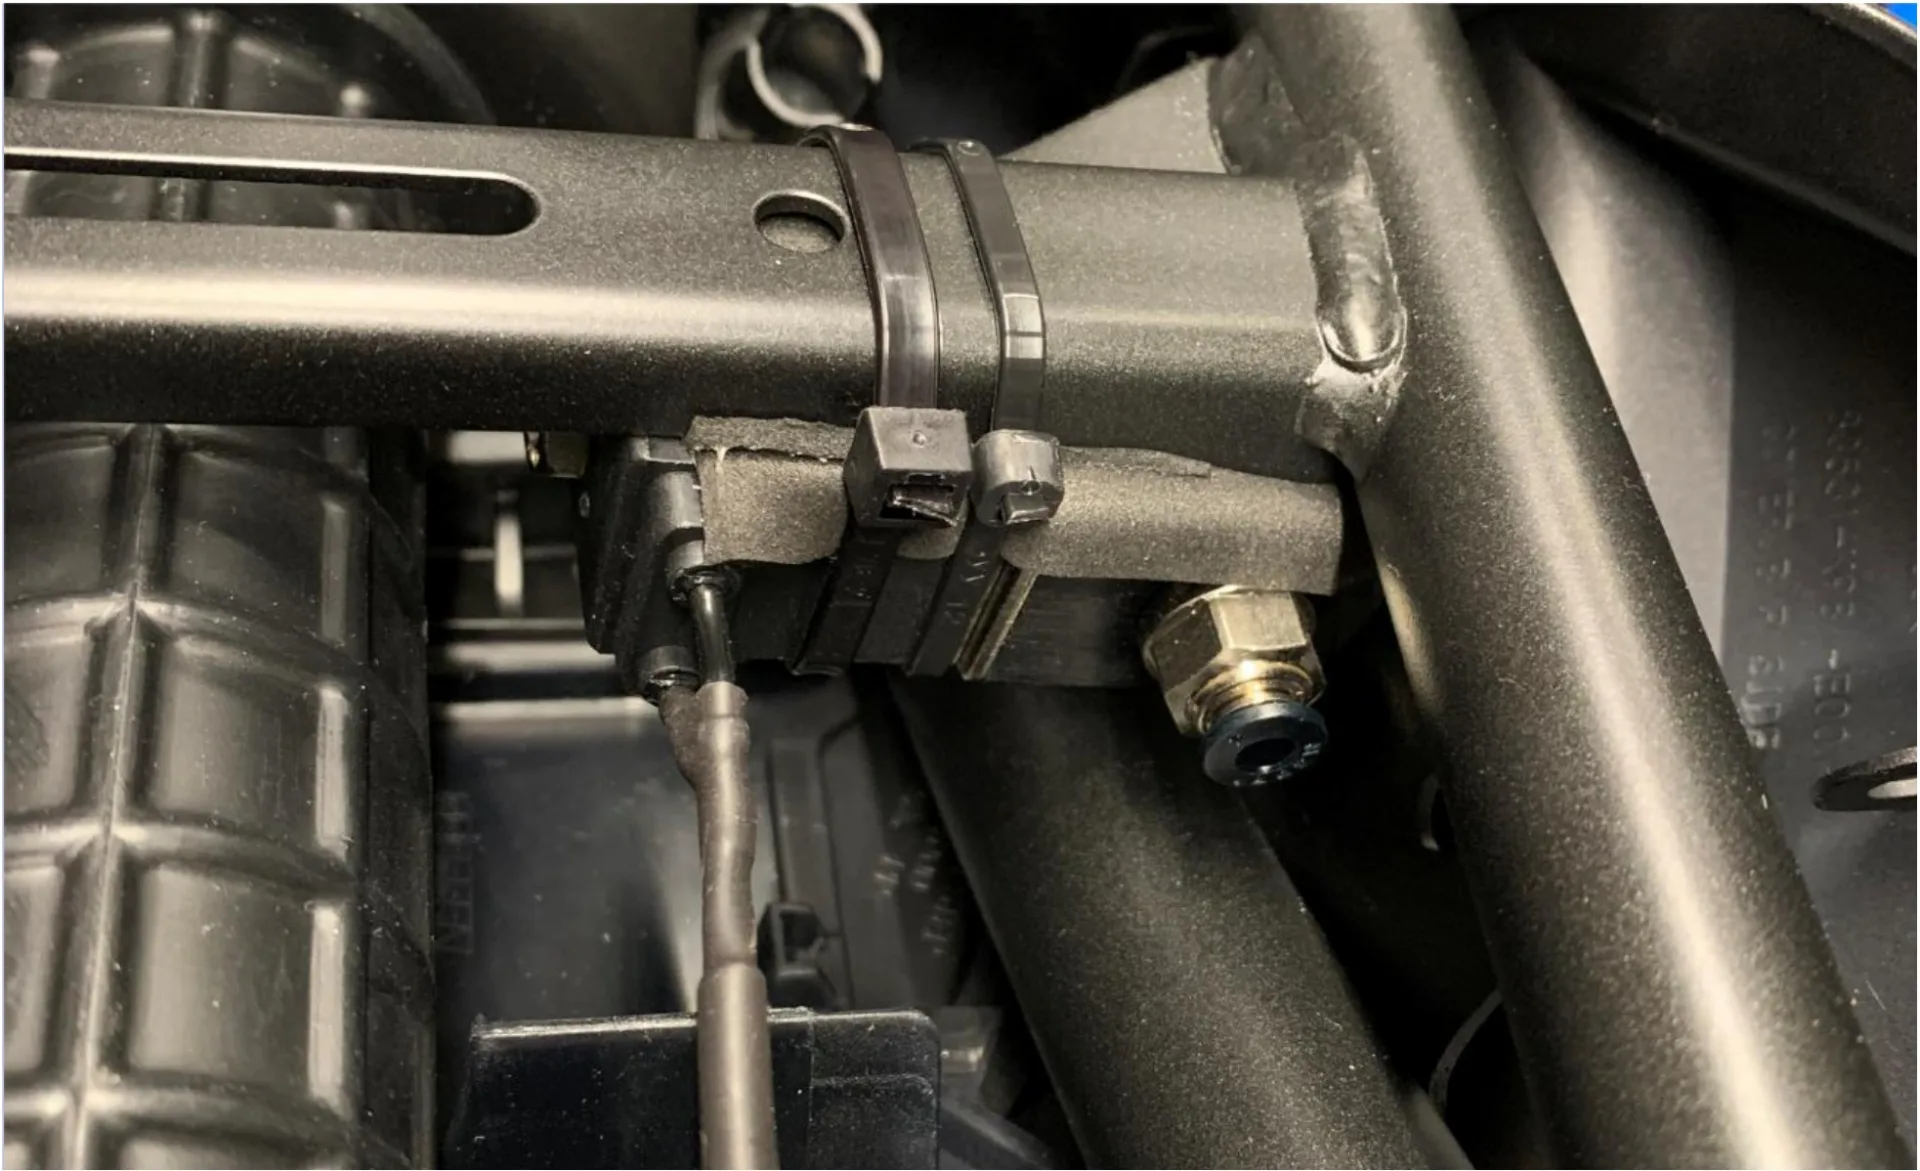
Metering valve
The metering valve is attached with a cable tie to the cross brace under the front seat. As protection I stuck foam between the brace and the metering valve.
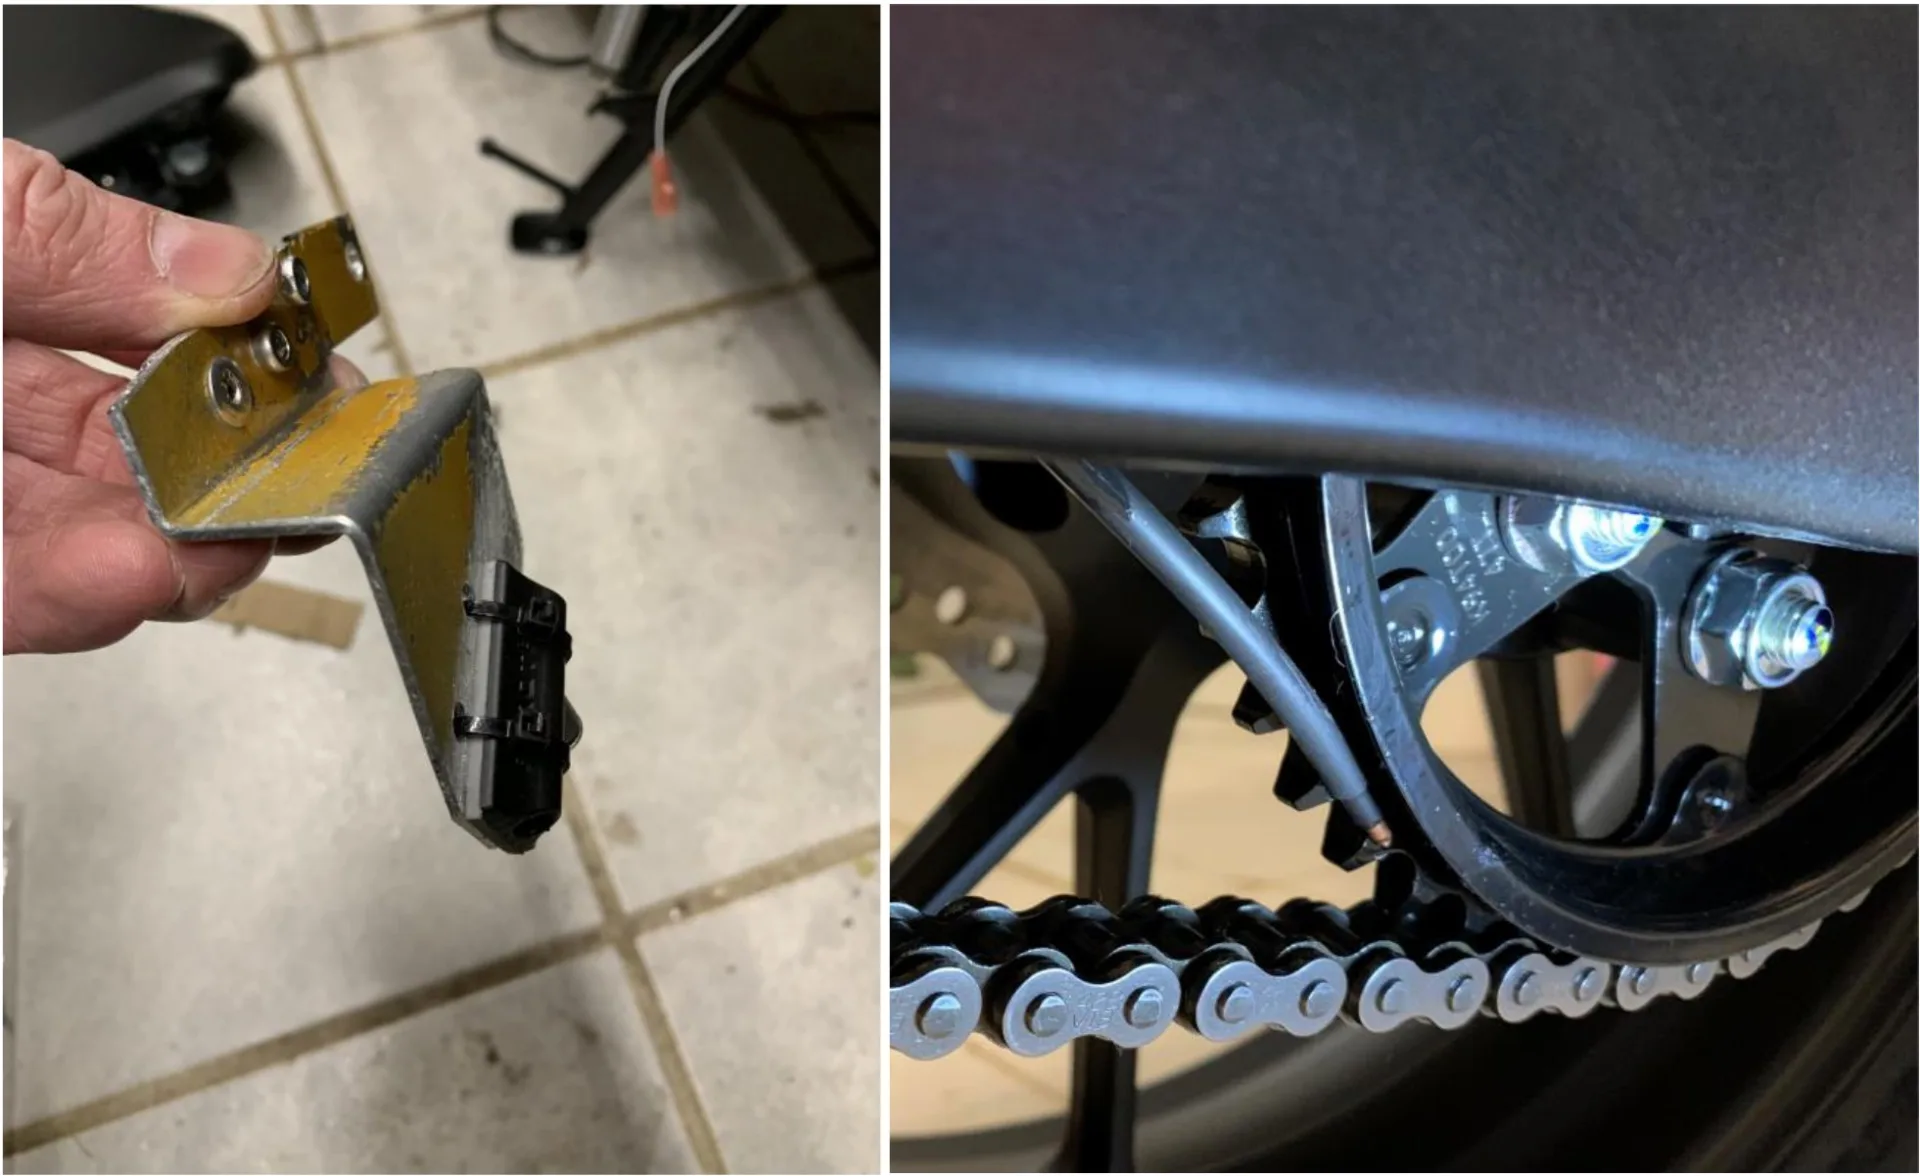
Nozzle
Fitted at the rear sprocket. The bracket is held together with the chain guard and rests on the swingarm. To protect the swingarm I stuck foam between the swingarm and the bracket.
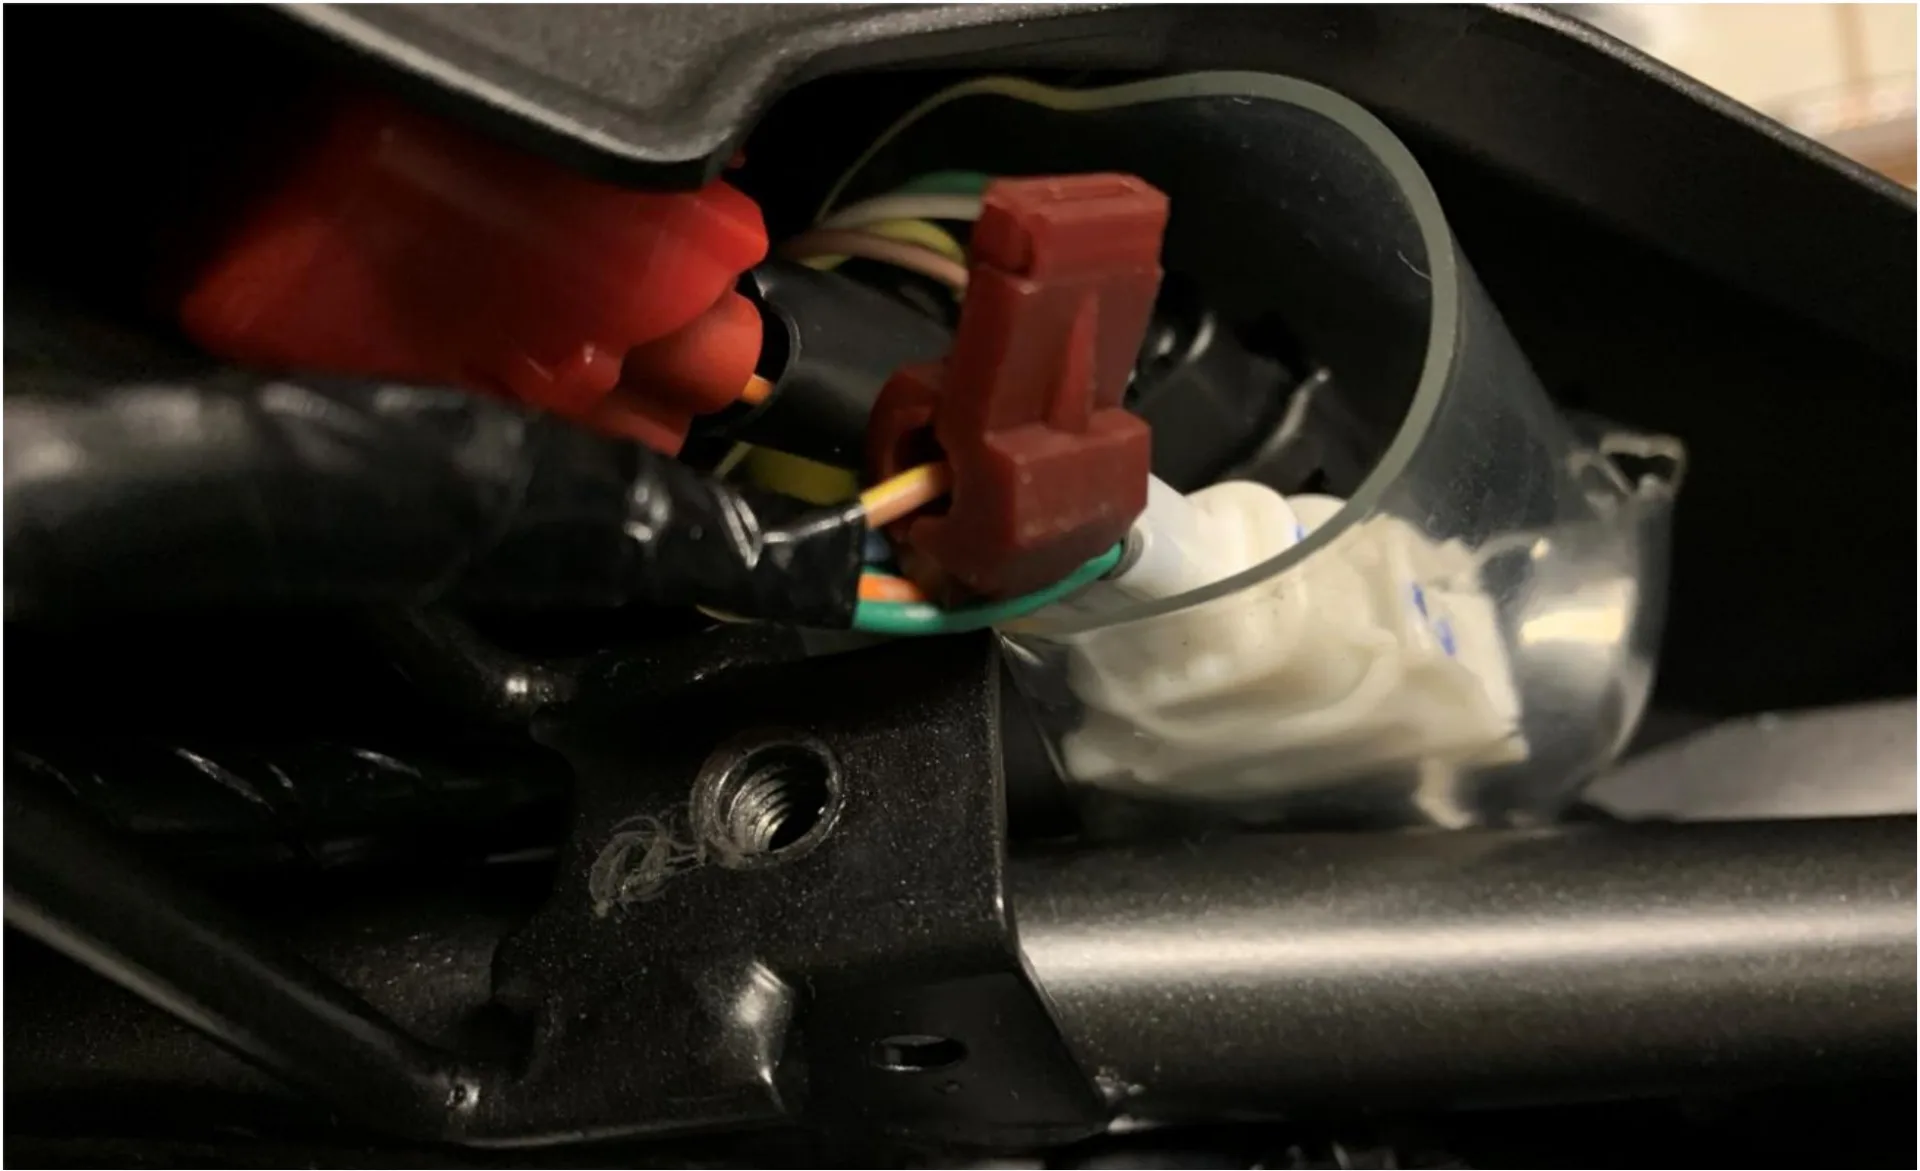
Switched 12 V supply
I tapped the switched positive behind the white connector for the indicators and the licence plate light, on the licence plate light wire (brown/yellow), with the branch connector.
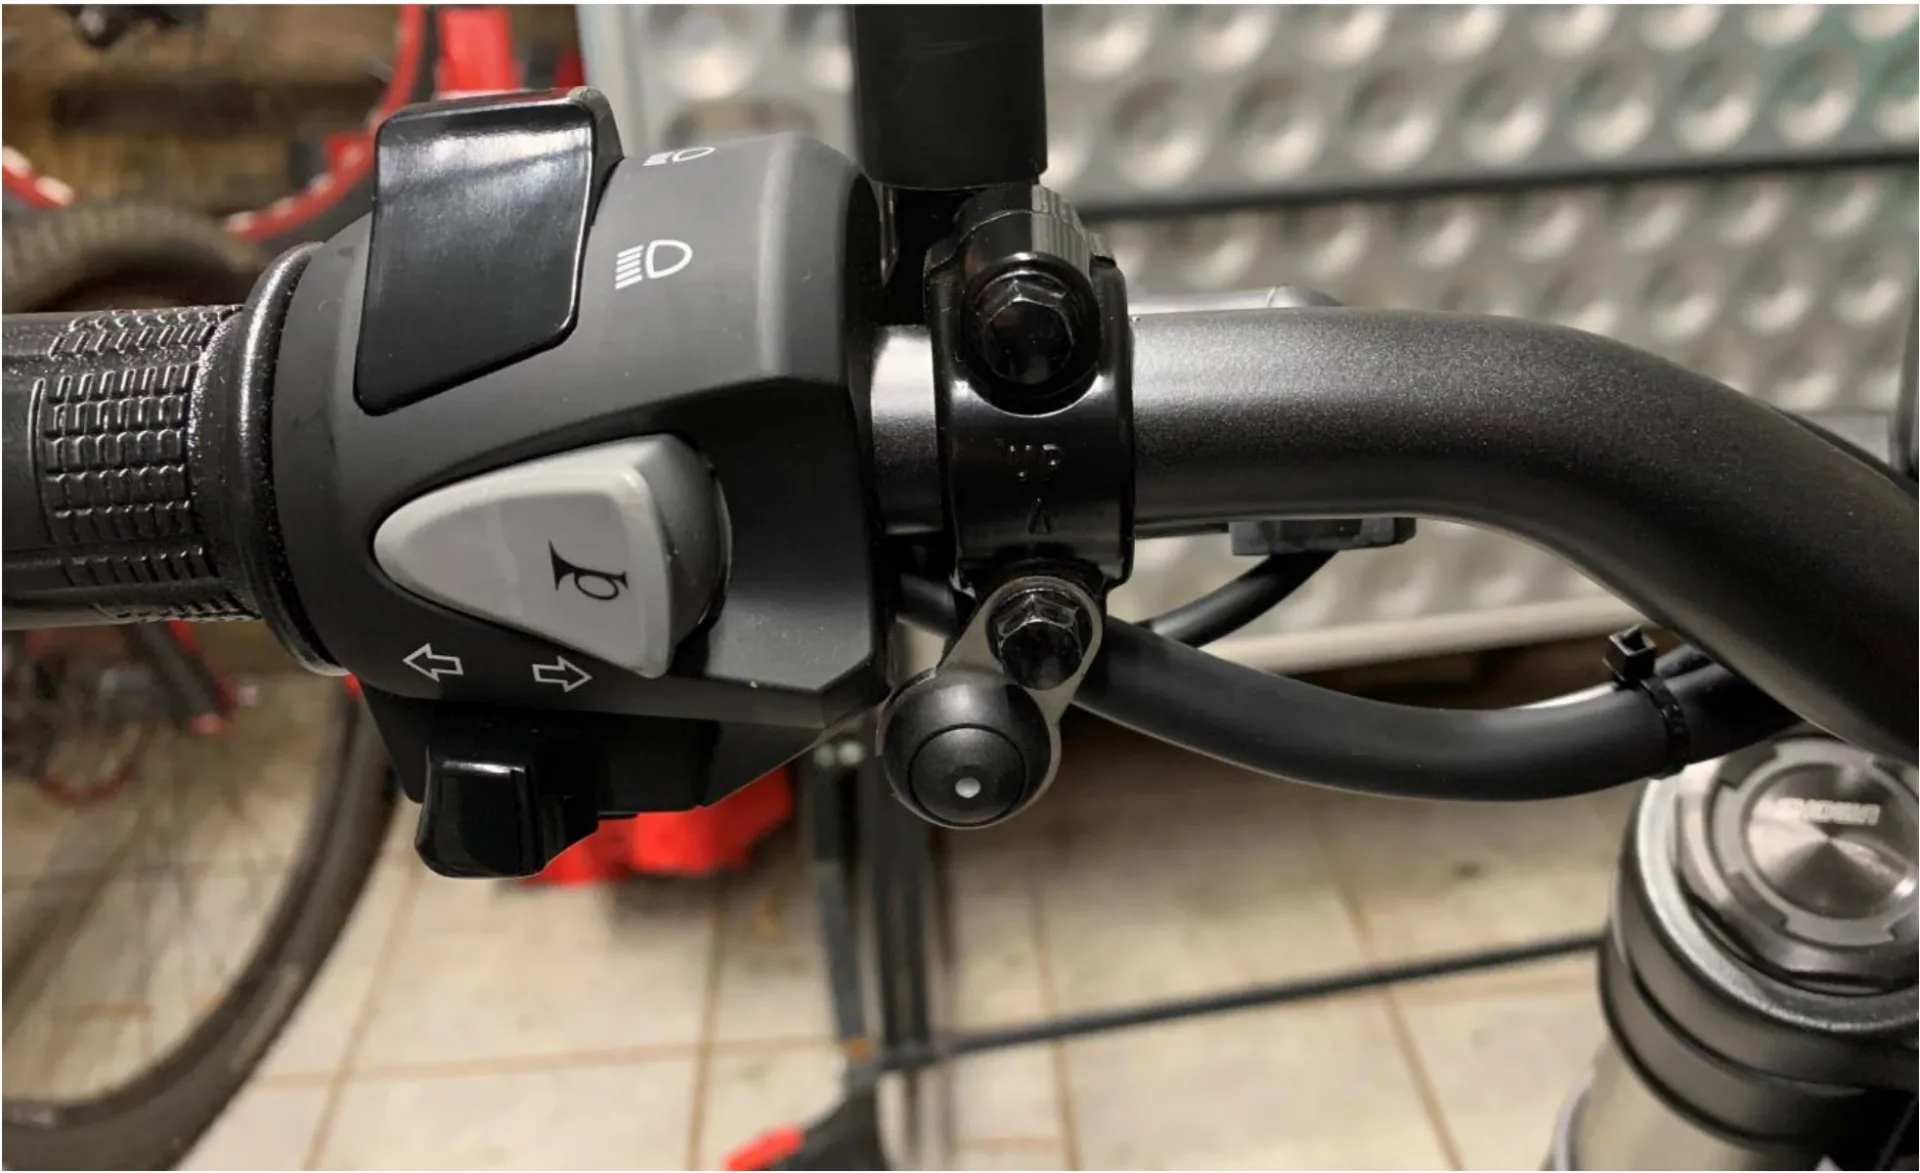
Rain switch
The rain switch is attached at the front left to the mirror mount with the supplied bracket. The cable runs along the original cable and wiring harness, on the left side under the fuel tank towards the rear.
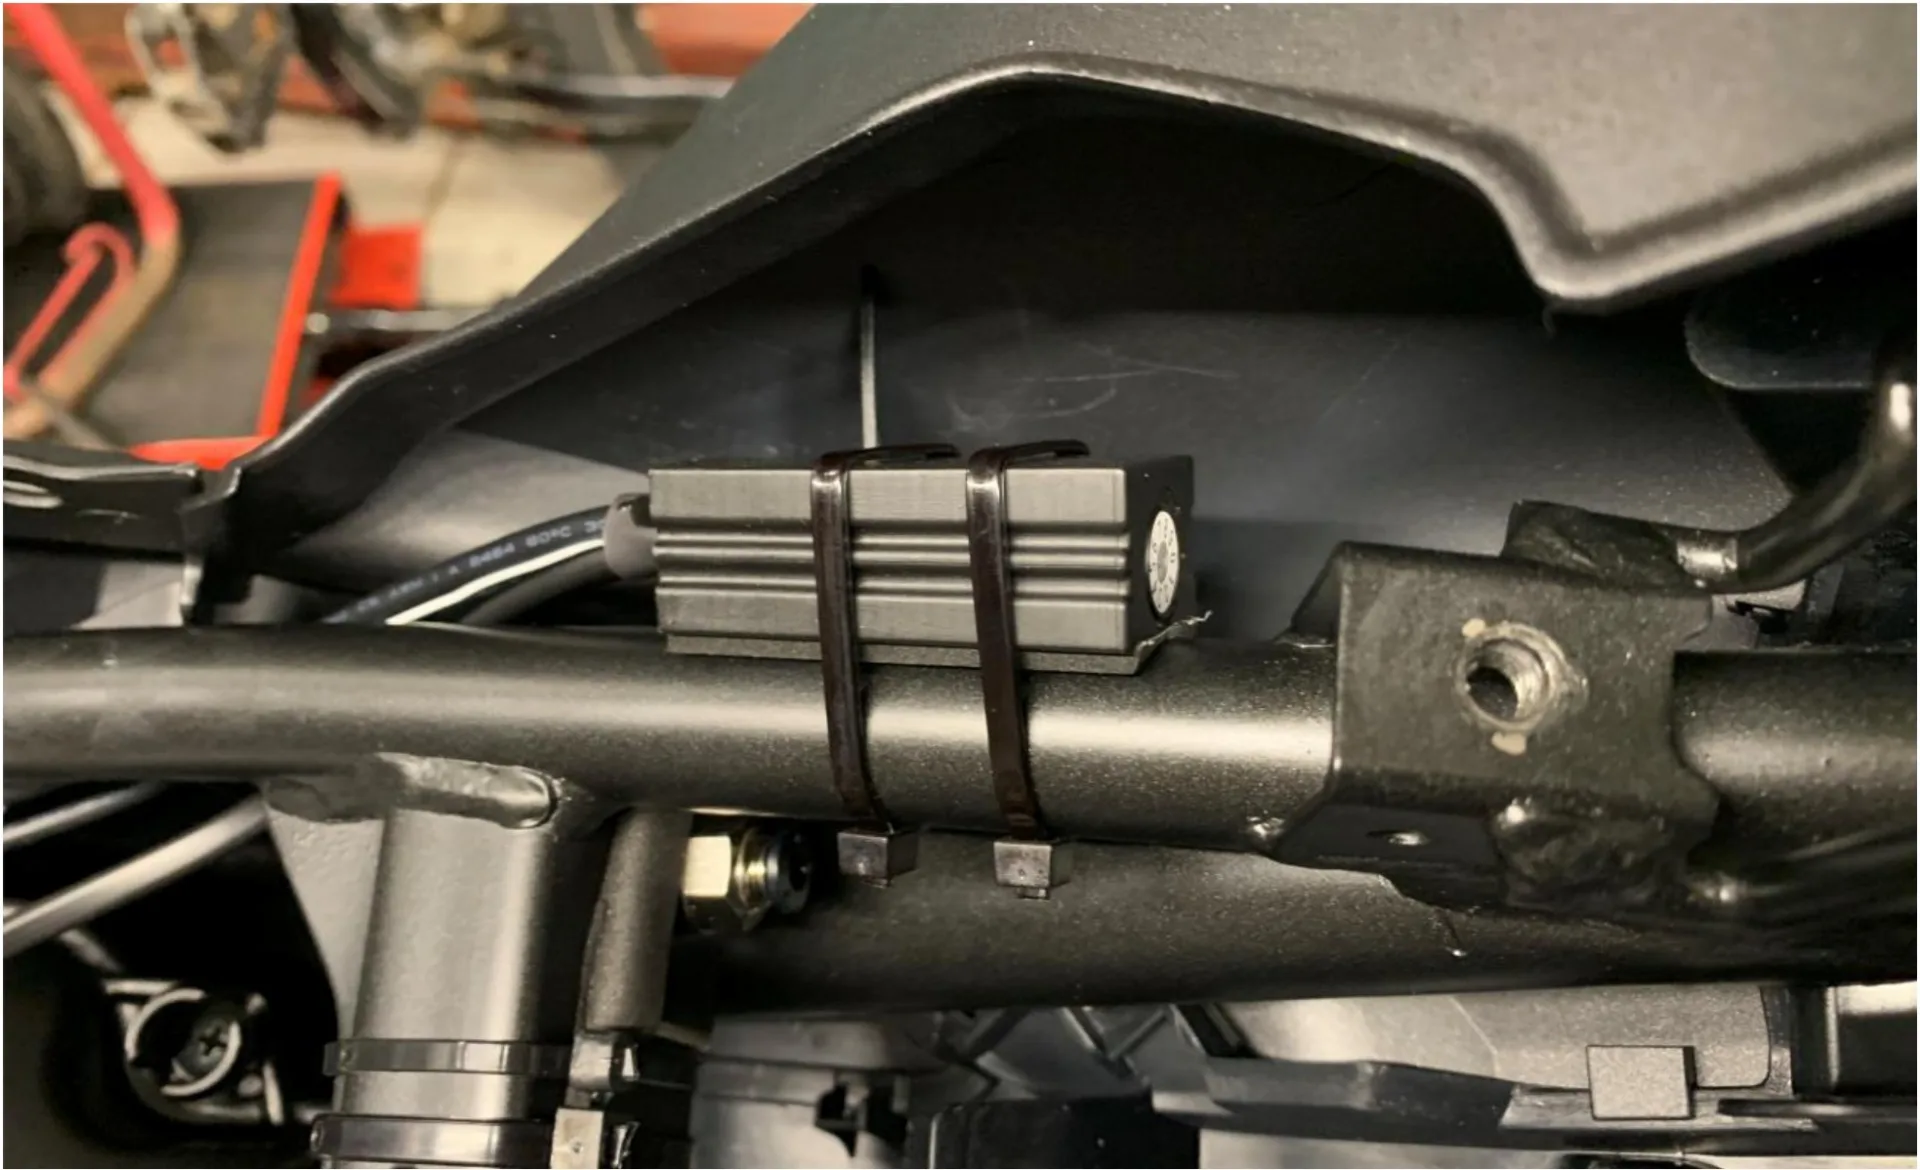
Control unit
The control unit is attached to the right-hand frame under the front seat with a cable tie. To protect the frame I stuck foam onto the control unit.
Installation report by Frank T.
Honda CB125R – year of manufacture 2020
This is how Frank T. solved the installation – unfortunately we cannot guarantee that it works correctly, as we were not able to check the installation ourselves.
Oil reservoir 60 ml
The oil reservoir sits under the rear seat and is attached with two adhesive brackets and cable ties.
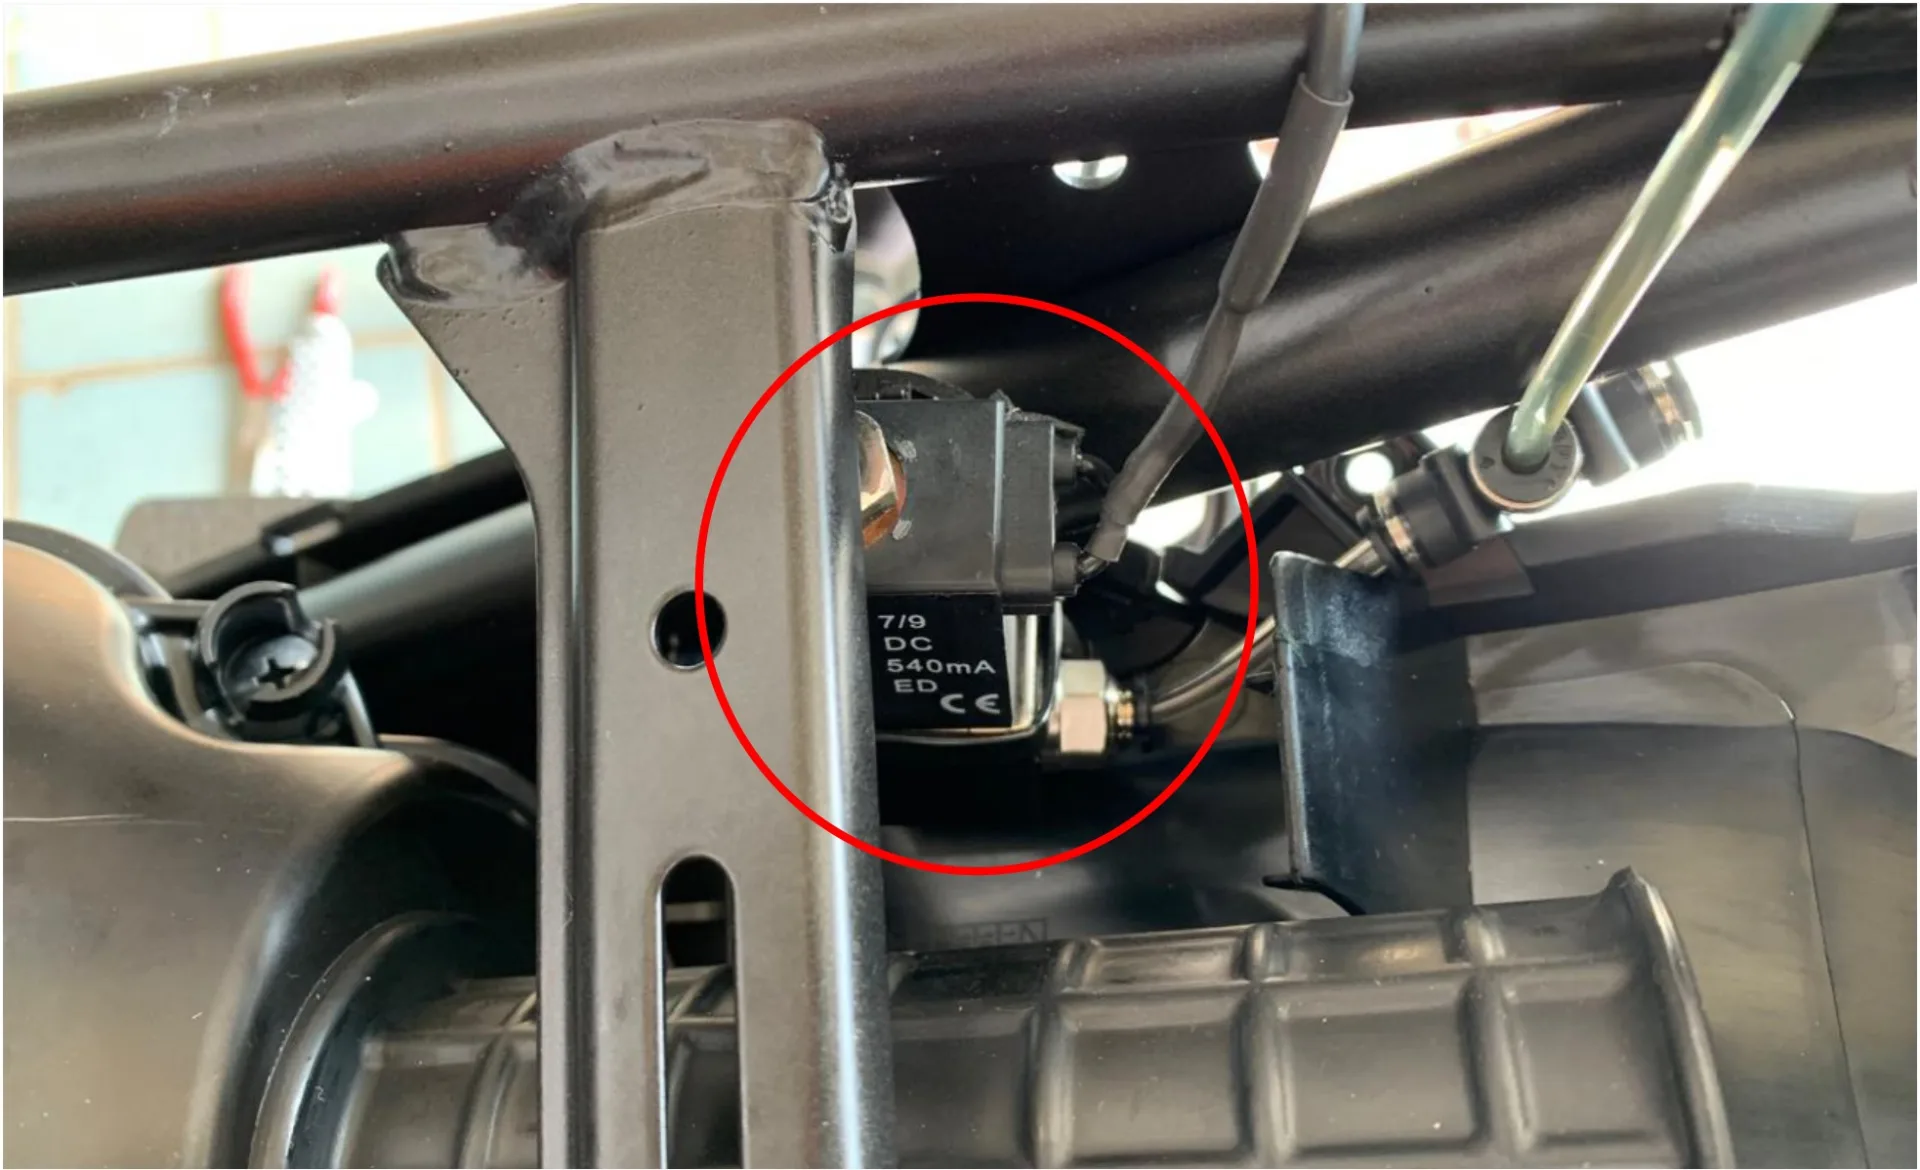
Metering valve
The metering valve is attached to the frame with a cable tie under the front seat, on the right below the cross brace. As protection I stuck foam between the frame and the metering valve.
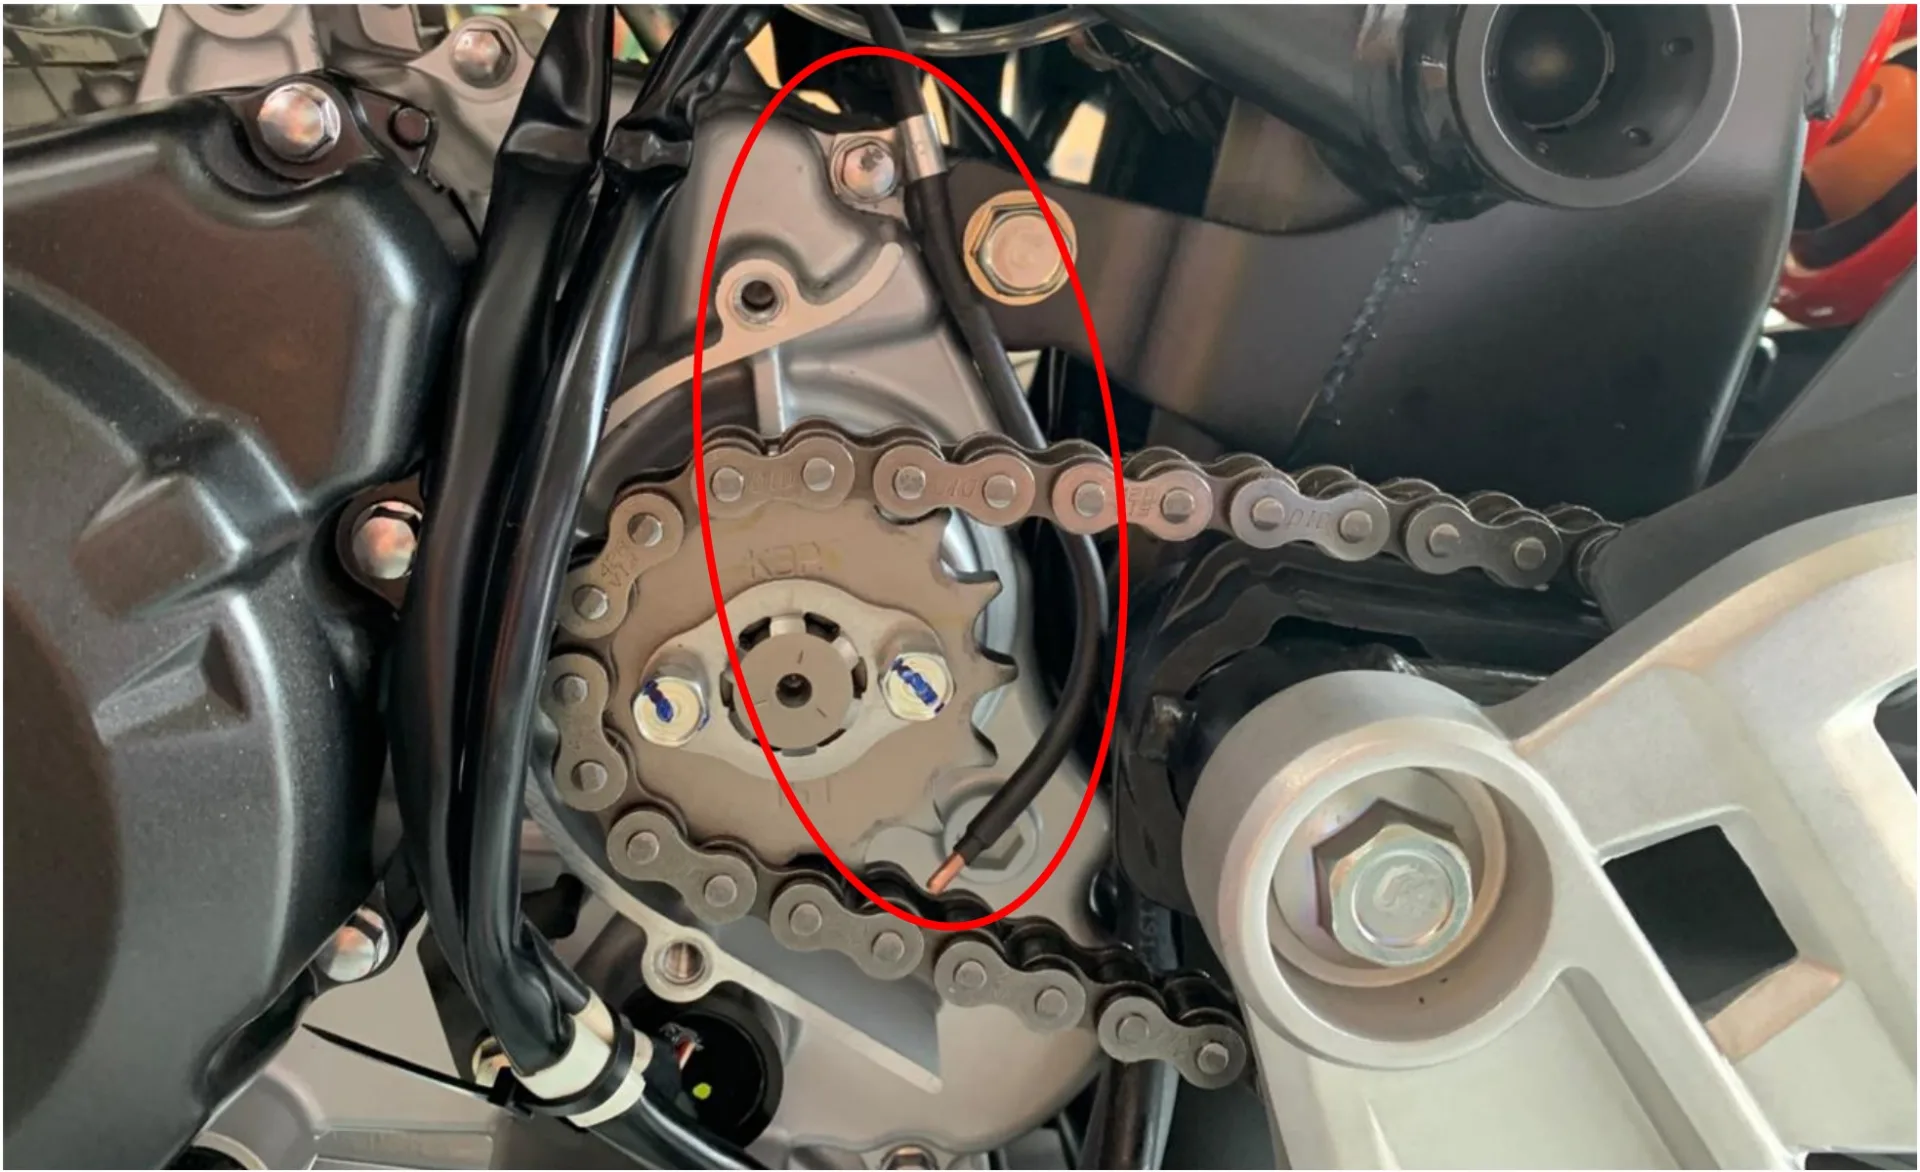
Nozzle
The nozzle is attached at the front sprocket with the supplied clamp, using the original cover bolt.
Switched 12 V supply
I tapped the switched positive with the branch connector at the white connector for the indicators and the licence plate light, on the licence plate light wire (brown/yellow).

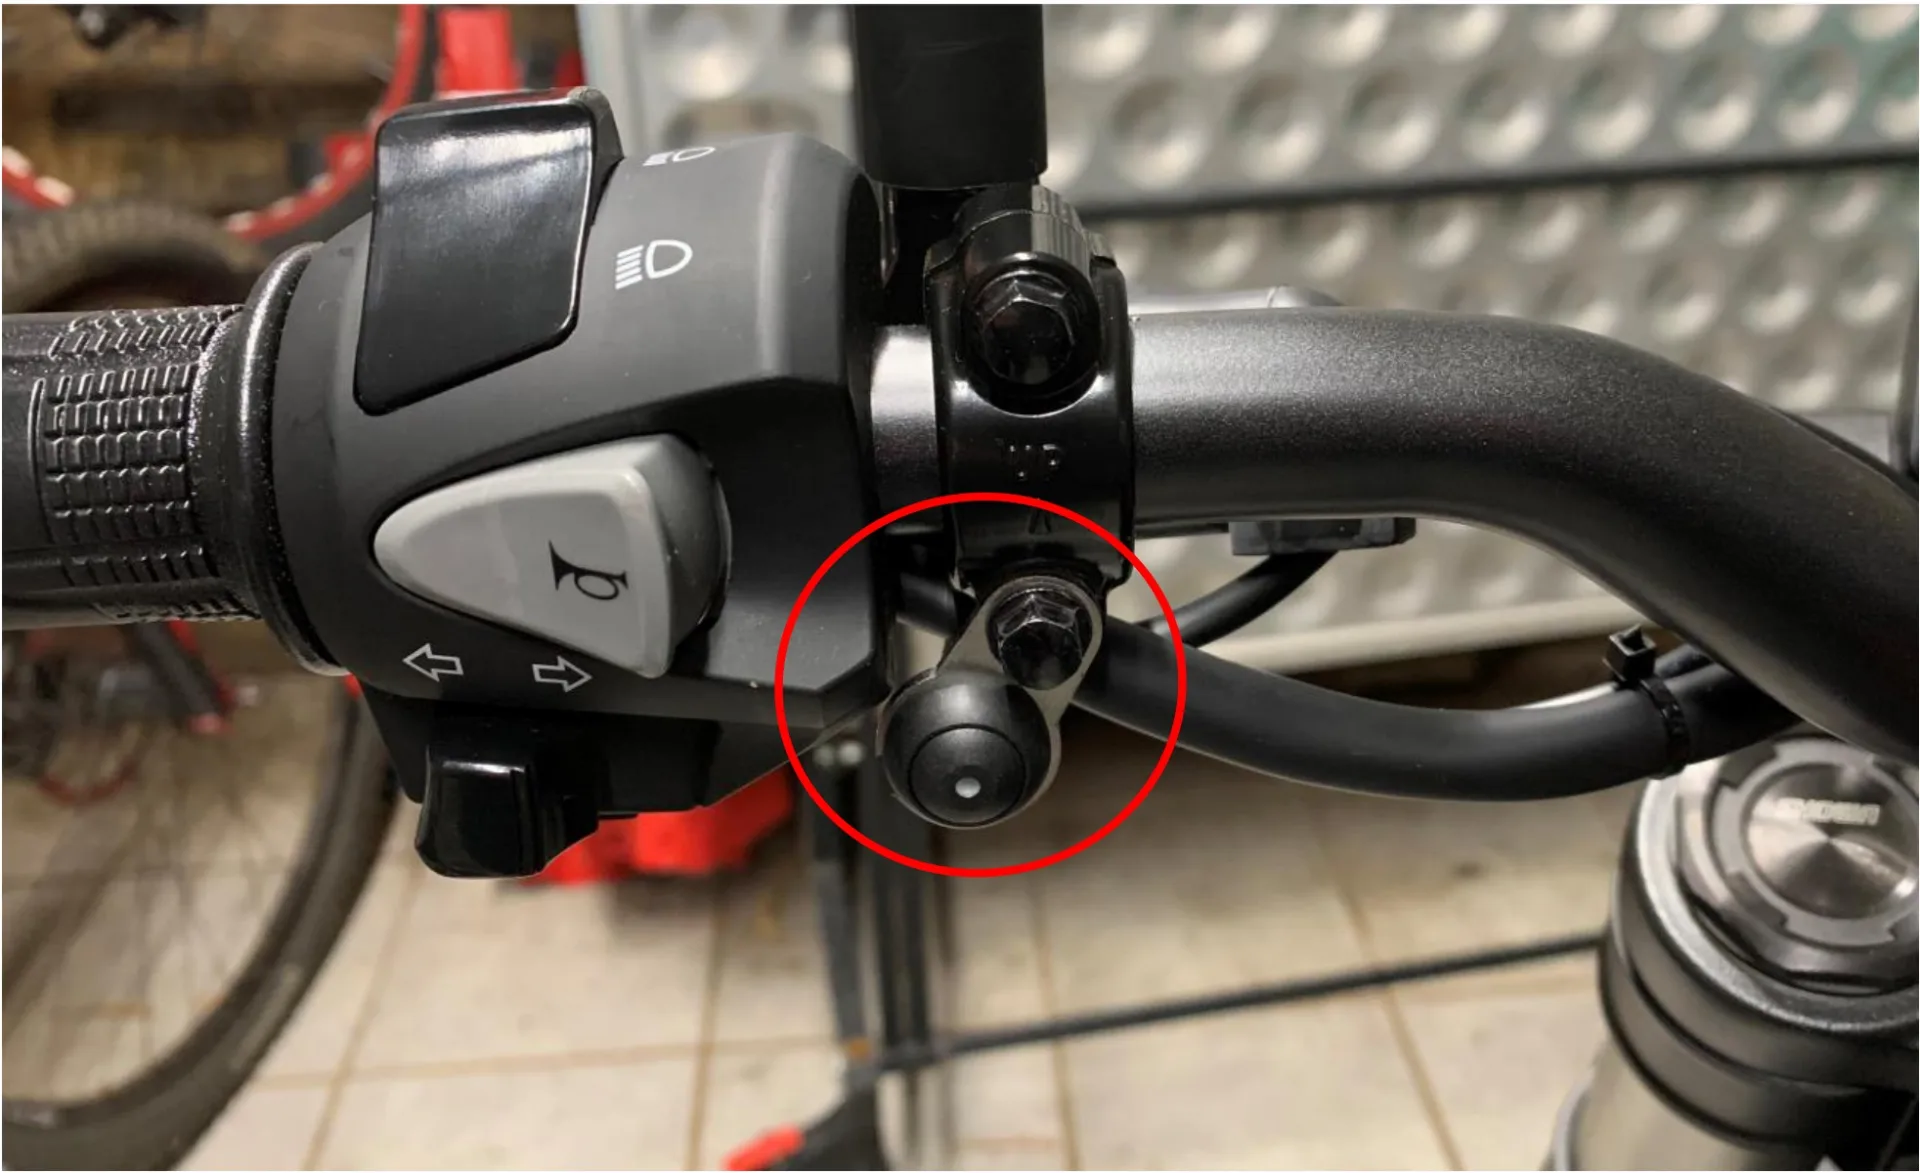
Rain switch
The rain switch is attached at the front left to the mirror mount with the supplied bracket. The cable runs along the original cable and wiring harness, on the left side under the fuel tank towards the rear.
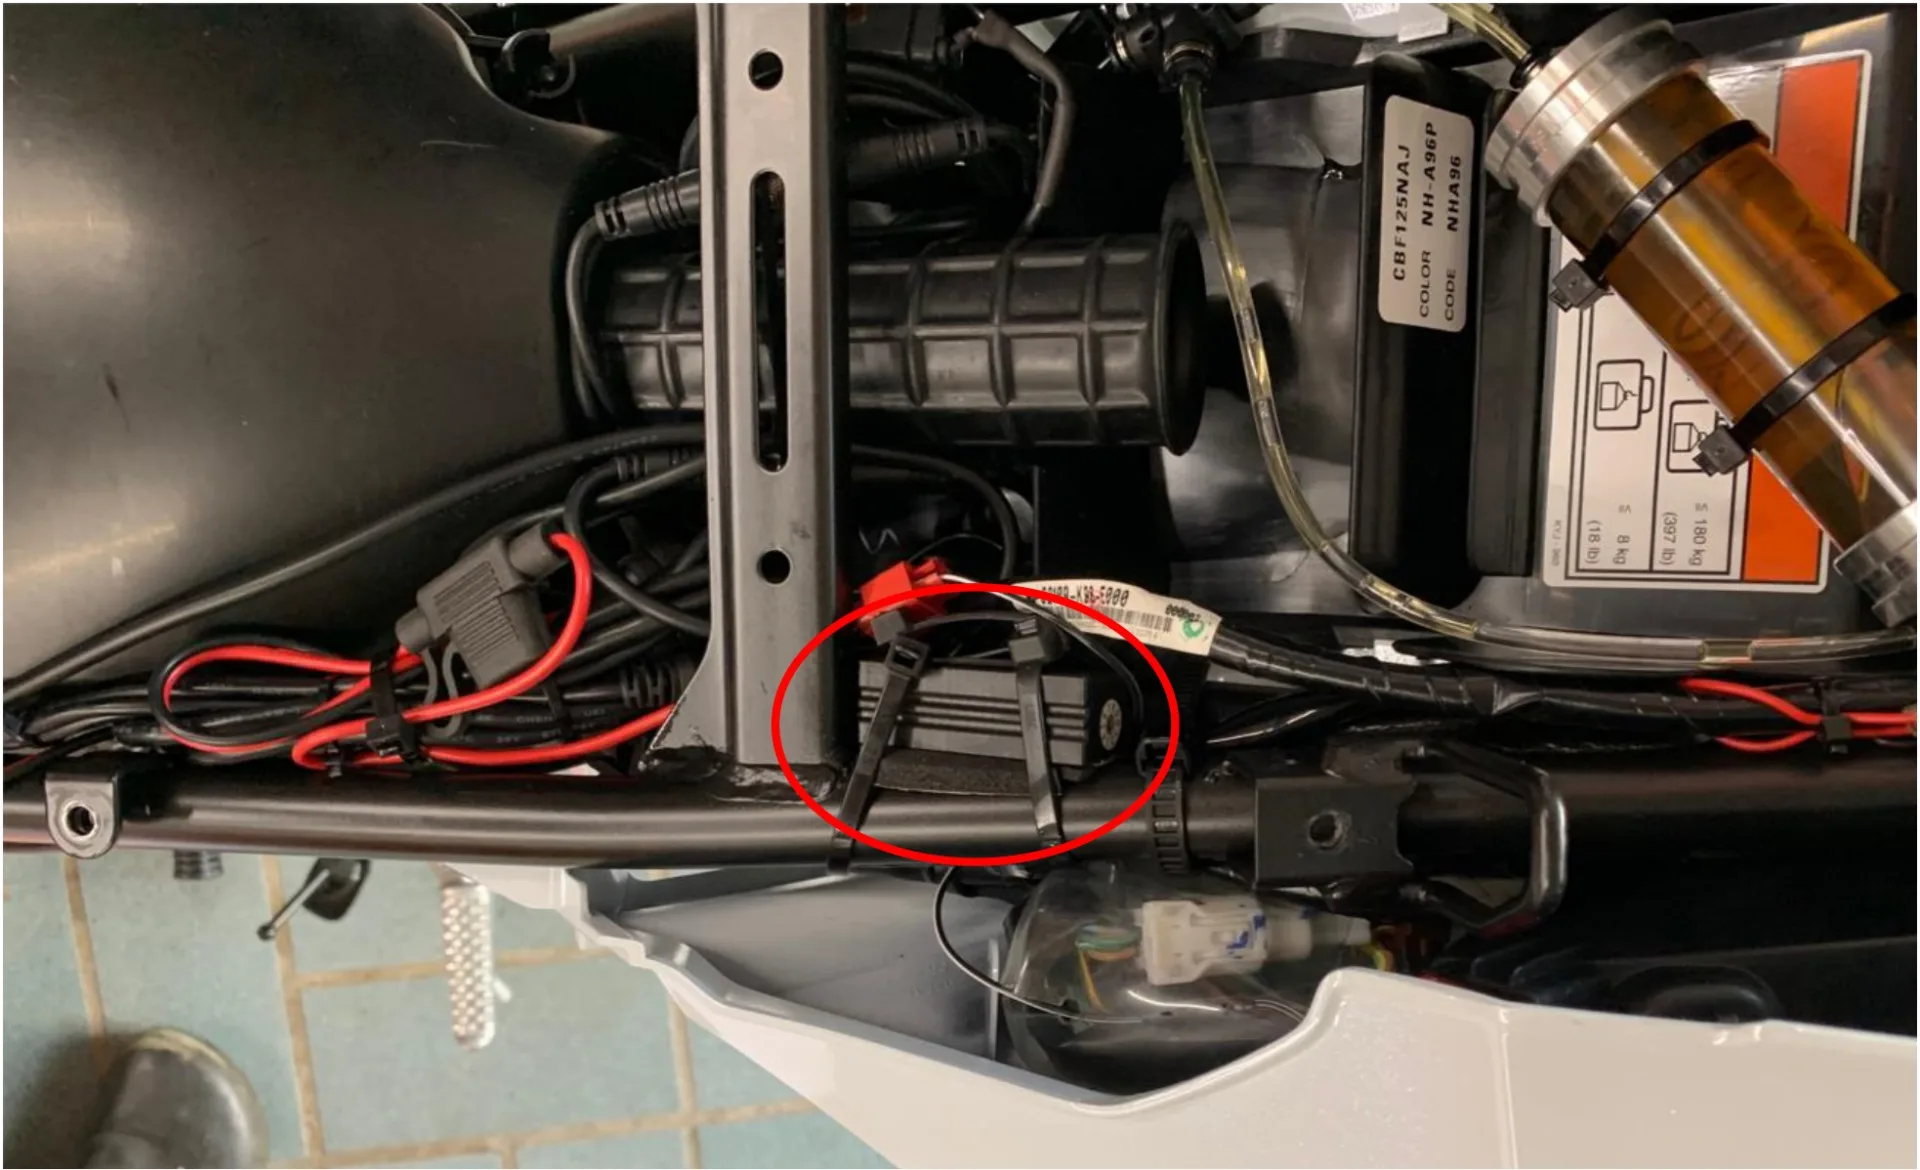
Control unit
The control unit is attached to the left-hand frame under the front seat with a cable tie. To protect the frame I stuck foam onto the control unit.
Have you fitted a MOFESSOR? Contribute your own installation report – directly here, with your photos.


