
Chain oiler for the Honda CBF1000

Installation report by Sven NV
Honda CBF1000 – year of manufacture 2007
This is how Sven NV solved the installation – unfortunately we cannot guarantee that it works correctly, as we were not able to check the installation ourselves.

Oil reservoir 120 ml
The oil reservoir fits nicely behind the left rear fairing, behind the voltage regulator. There is enough room there for the long-range version. The only slightly tricky part is finding good spots for the cable ties on the frame tubes.
Metering valve
The valve also fits behind the left rear fairing. If you use the angle bracket slightly offset, you can place it with a cable tie on a flat frame part directly in front of the voltage regulator, and at the same time keep some clearance from it.

Nozzle
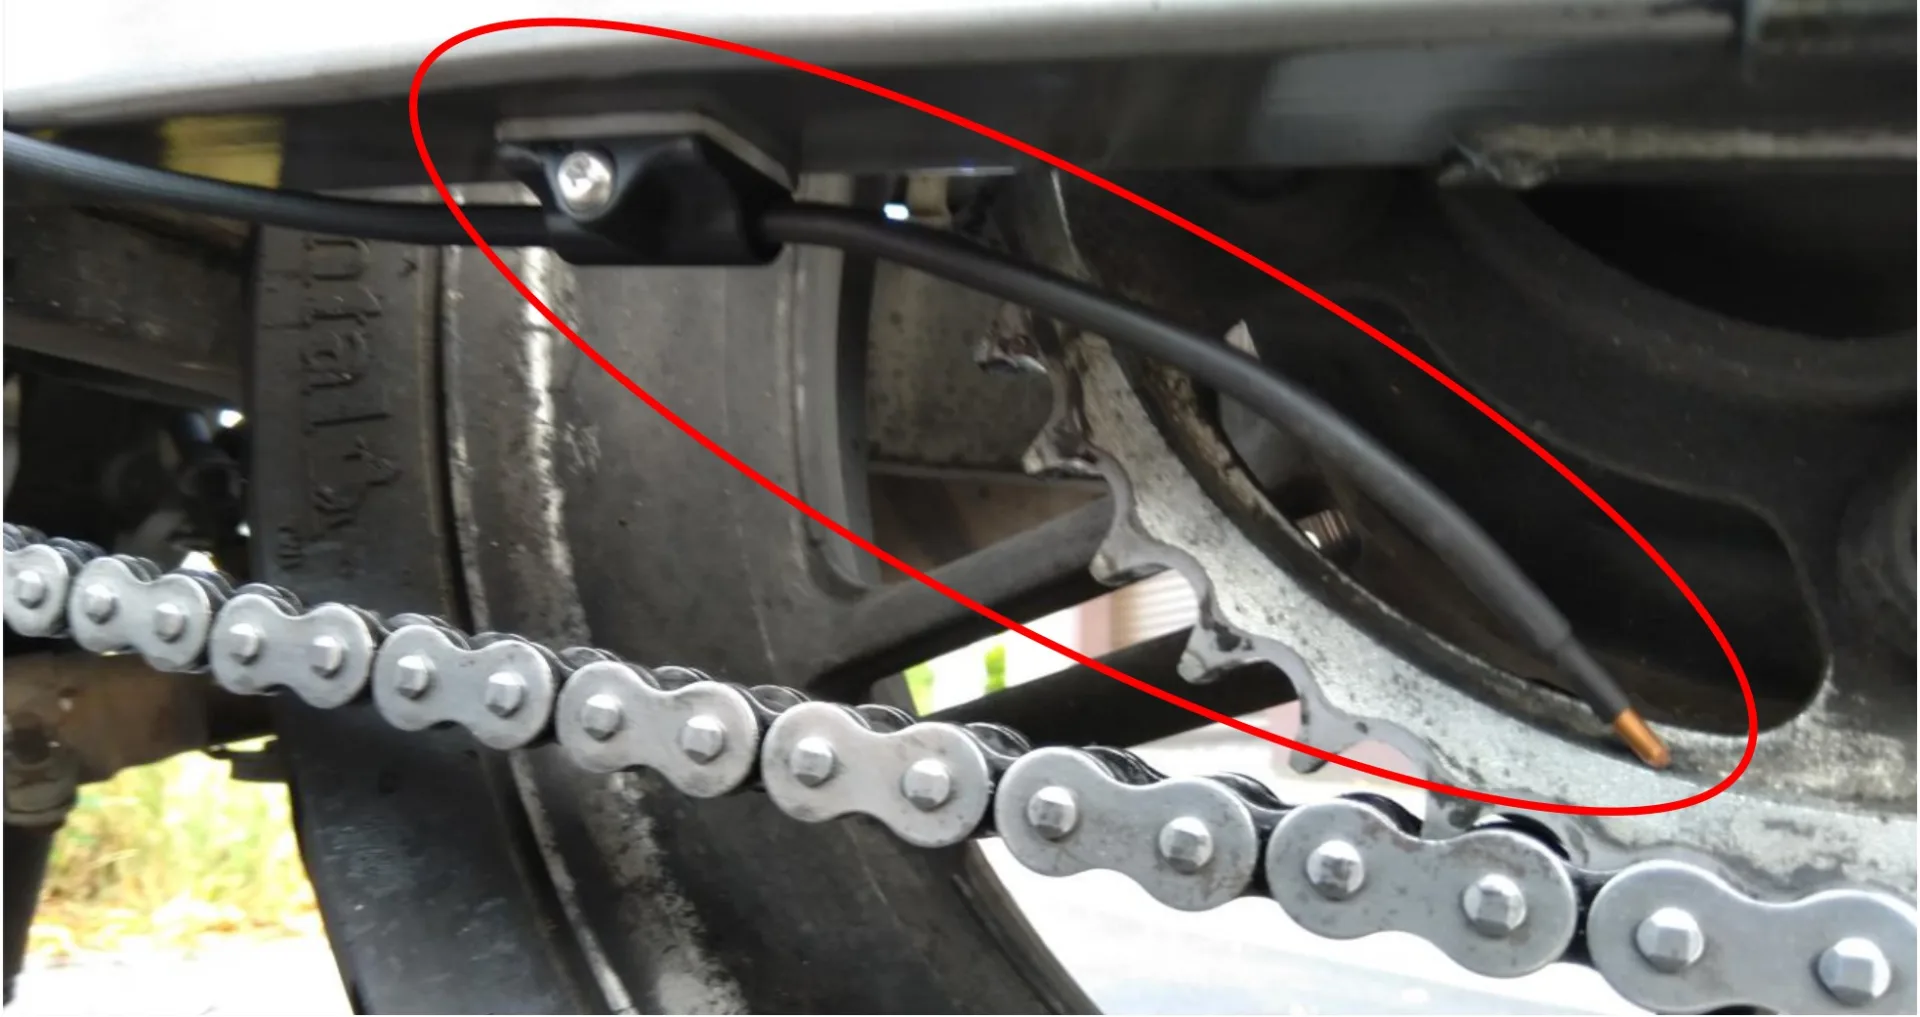
The nozzle can be attached with the adhesive pad on the underside of the swingarm, in order to drip onto the rear sprocket. From there the hose can be led forwards very well on the outer side of the swingarm, and is thus away from the vicinity of the chain. Between the swingarm and the “pillion footpeg / exhaust arm” the hose can run without risk and with enough slack for the movement of the swingarm.
Switched 12 V supply
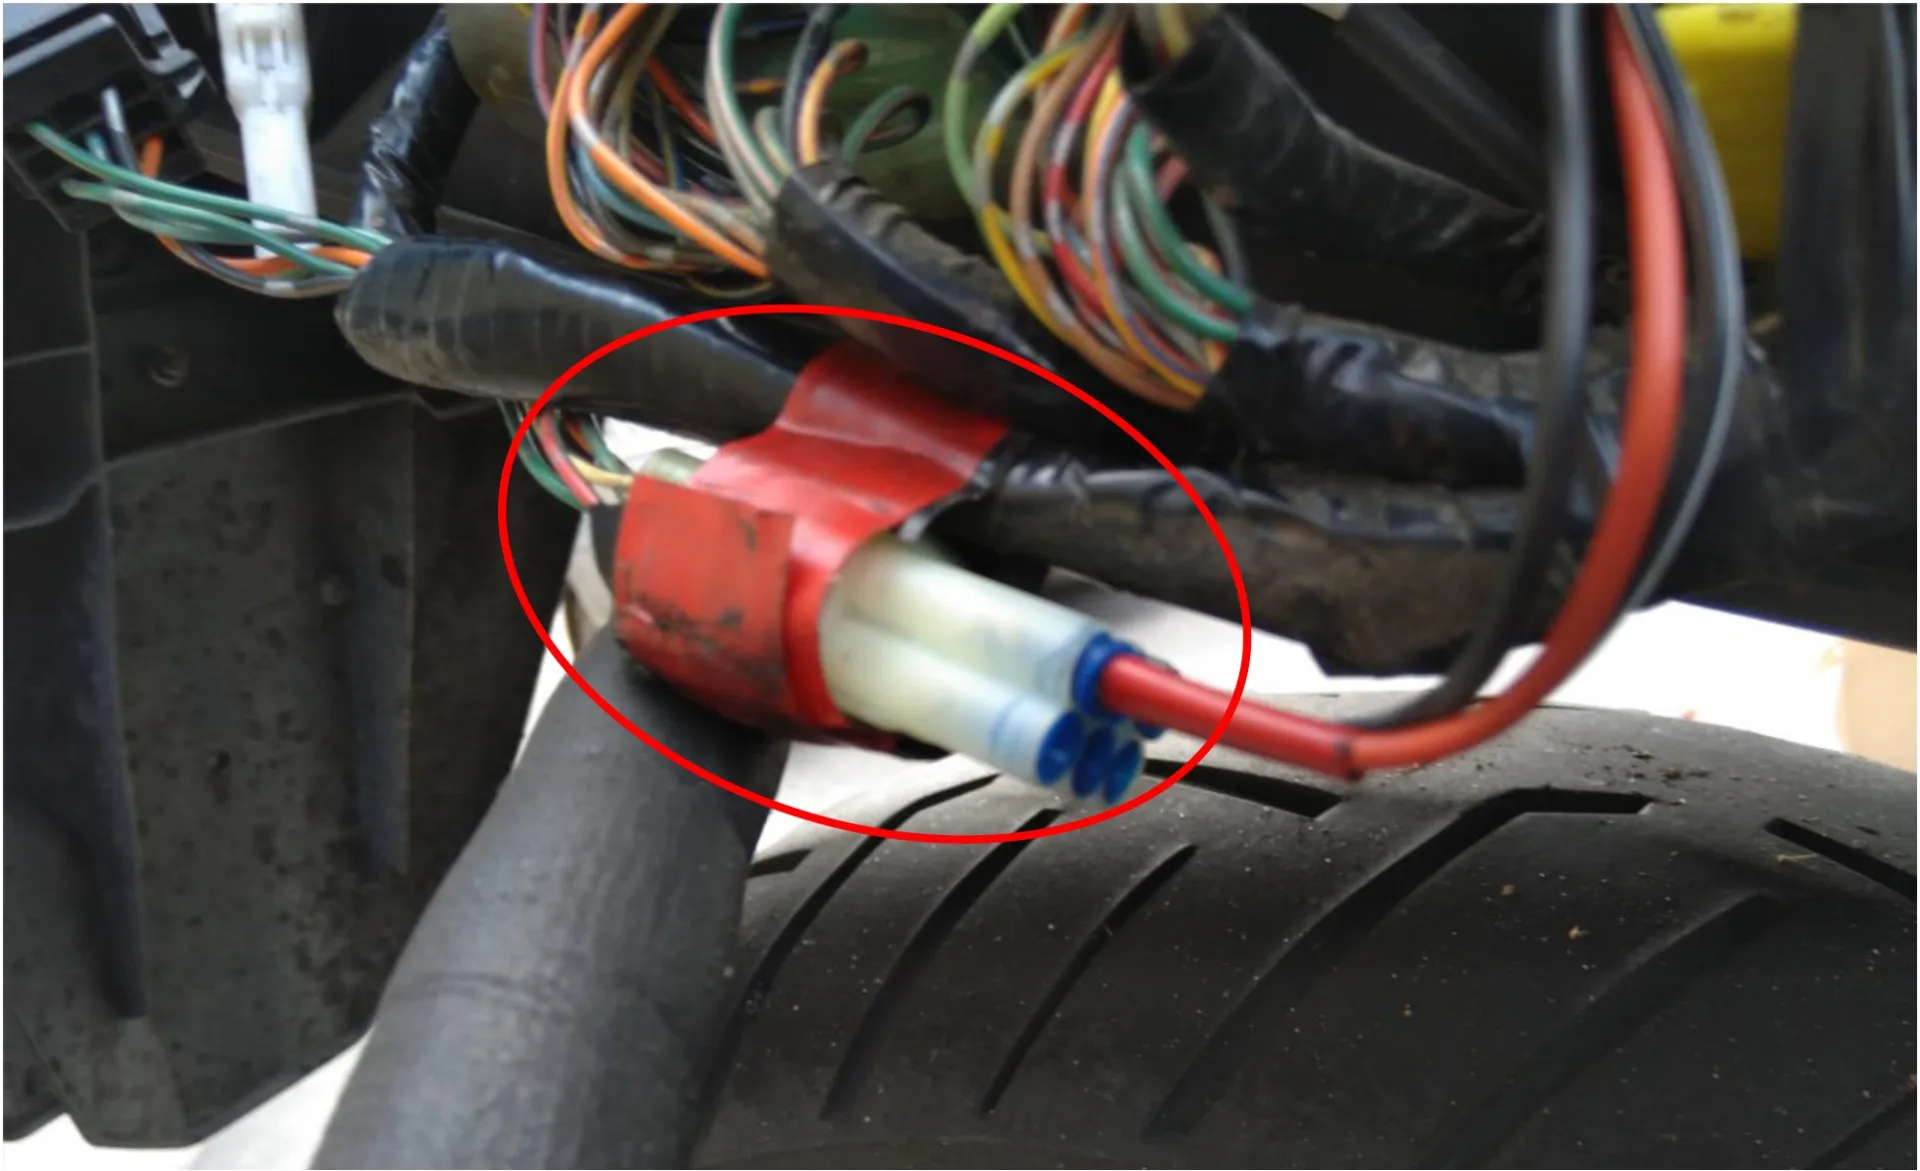
I connected the power supply with the six-pin Honda connector to the “Option” connector. This is located behind the right rear fairing under the ECU, fitted with a blanking plug and taped to the wiring harness. It is a little hidden, but easy to find if you take hold of the wiring harness (control wire). I crimped the positive and the control wire together into one pin. According to the instructions that is fine, and the switched positive at the Option connector is protected by 10 A. (Fuse D: starter motor and lean angle sensor.)
Rain switch
The rain switch fits perfectly on the retaining clip for the clutch lever. From there it can first follow the wires from the indicator and light switch housing, in order then to cross to the right side, because the ignition coils are on the left. On the right, the rain switch cable can then follow the main wiring harness and the ABS lines under the fuel tank.

Control unit
The control unit (and all the surplus cabling) sits under the seat on top of the ABS module.

Have you fitted a MOFESSOR? Contribute your own installation report – directly here, with your photos.


